The Essential Guide to Mason Bees Cocoons for Your Garden
Mason bees are remarkable pollinators that play a crucial role in our ecosystems. Unlike honeybees, these solitary bees thrive in small spaces and are known for their unique nesting habits. One of the most fascinating aspects of their life cycle is the cocoon stage, where they transform from larvae into adult bees. Understanding mason bee cocoons not only helps you appreciate these vital creatures but also empowers you to support their populations in your garden.
These cocoons serve as protective shelters, ensuring the larvae survive through harsh weather and predators. By providing the right environment, you can encourage mason bees to thrive in your backyard. Whether you're a seasoned gardener or just starting out, learning about mason bee cocoons can enhance your gardening experience while contributing to the health of local ecosystems. Dive into the world of mason bees and discover how these tiny architects can make a big impact.
Understanding Mason Bees Cocoons
Mason bees cocoons serve as protective structures for larvae during their development phase. These cocoons play a vital role in ensuring the survival of the species in varied environmental conditions.
What Are Mason Bees?
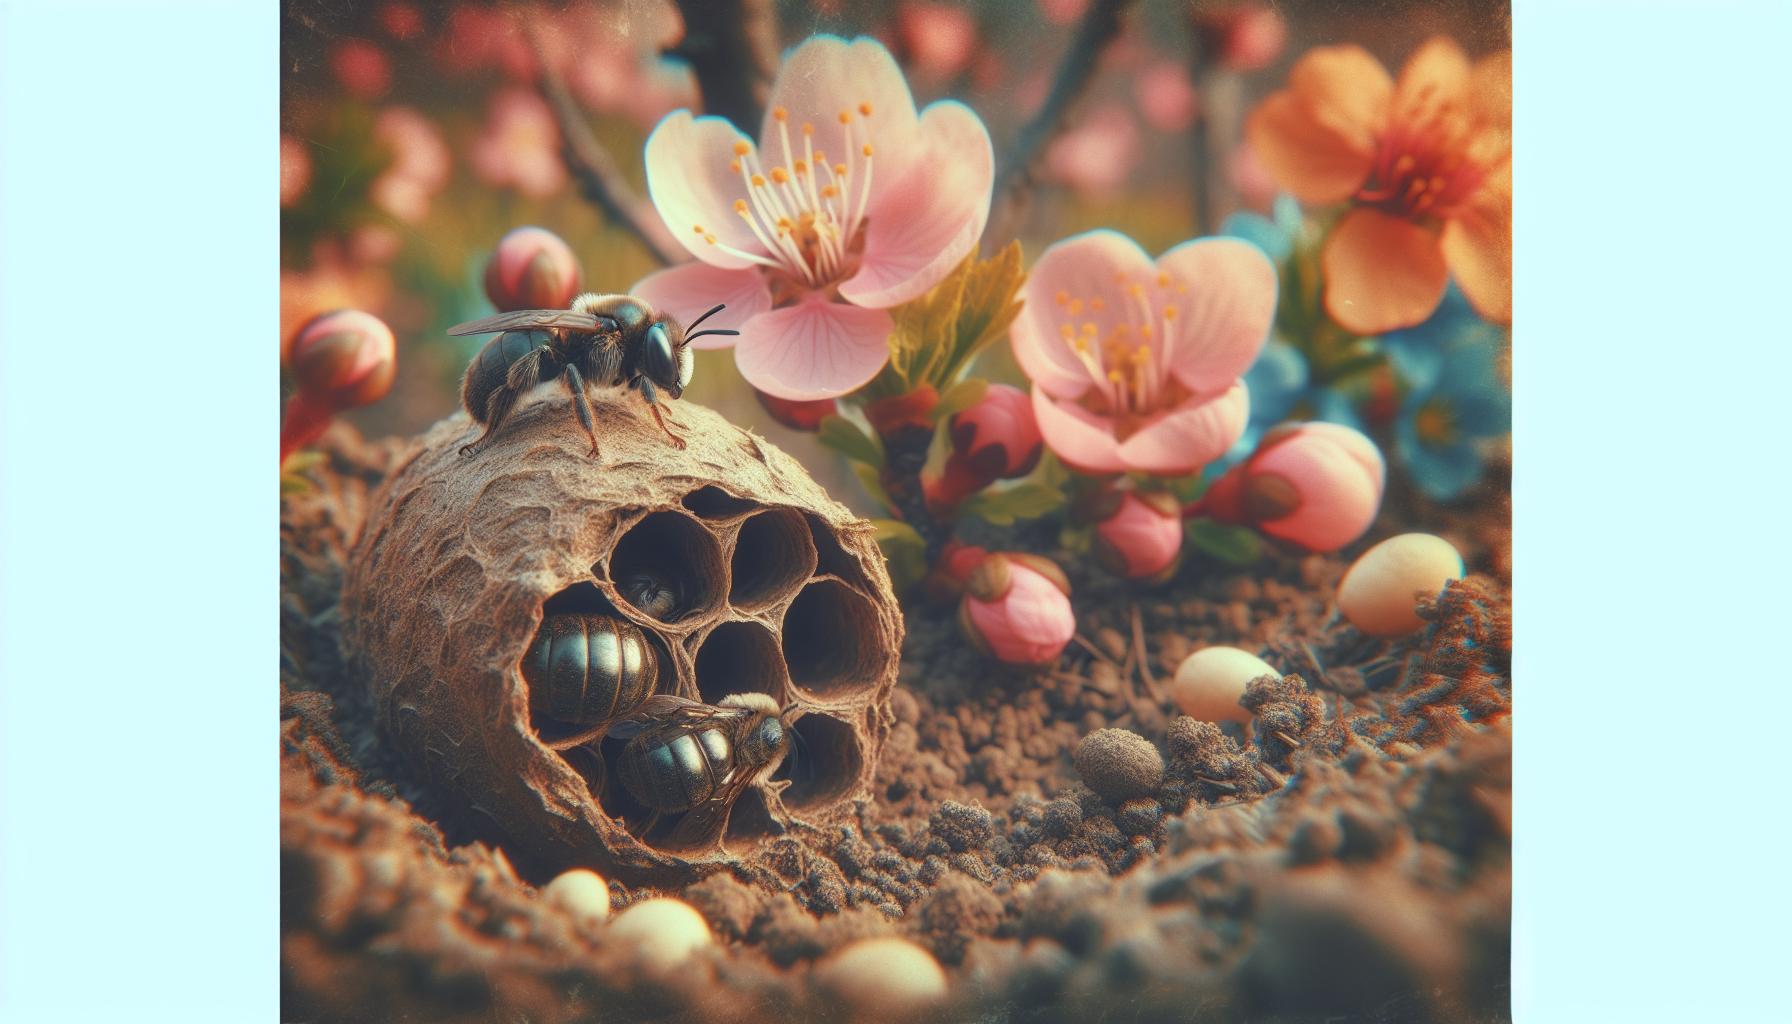
Mason bees exemplify solitary bees, distinct from honeybees or bumblebees. They are typically small and come in diverse species, mainly belonging to the Osmia genus. Mason bees gather pollen and nectar to nurture their young. They do not store honey like honeybees. Instead, they build nests in natural cavities, using mud to create partitions between the brood cells. Females lay eggs in these cells, providing the necessary nourishment. This nesting behavior enhances the bee's ability to thrive in various habitats.
Importance of Mason Bees in Pollination
Mason bees contribute significantly to pollination, often outperforming honeybees in this role. They are efficient pollinators due to their unique foraging behavior. While gathering pollen, they come into contact with flower anthers, effectively transferring pollen from one flower to another. This process is crucial for the fertilization of many plants. Mason bees are particularly valuable for early-blooming flowers, which rely on these bees for pollination when few other pollinators are active. Their activity boosts fruit and vegetable yields, making them essential for gardens and agricultural systems.
Life Cycle of Mason Bees
Mason bees undergo a simple life cycle consisting of four stages: egg, larva, pupa, and adult. After mating in spring, female mason bees lay eggs in their nests. Each egg develops into a larva that consumes the stored pollen. The larva eventually transforms into a pupa within the cocoon, where it undergoes metamorphosis. After several weeks, adult bees emerge in late spring or early summer. The entire life cycle usually takes about six weeks, allowing them to contribute to early-season pollination effectively. Understanding this life cycle can lead to better practices for supporting their populations.
Collecting Mason Bees Cocoons
Collecting mason bee cocoons is a crucial task for supporting their life cycle and health. Proper timing and the right tools enhance the efficiency of this process.
When to Collect Cocoons
Collect cocoons in mid to late spring, typically between April and May, once adult bees emerge. Monitor weather conditions; collect when temperatures stabilize above 55°F. Unearth cocoons before excessive rainfall and temperature drops occur, as these factors can cause mold or other issues. Inspect nests regularly during this period to ensure collection occurs just before the next generation disperses.
Tools Needed for Collection
Gather the following tools for a successful collection:
- Gloves: Use garden gloves to protect your hands from dirt and debris.
- Tweezers: Employ fine-tipped tweezers for the careful handling of fragile cocoons.
- Containers: Select small ventilated boxes or paper bags for storing cocoons.
- Notebook: Keep a notebook for tracking dates and conditions during collection.
- Brush: Use a soft brush for cleaning nests without damaging them.
Having these tools handy makes the collection process efficient and effective.
Step-by-Step Guide to Collecting Cocoons
- Locate nests: Identify nesting sites like drilled wood blocks or hollow stems.
- Inspect nests: Examine each nest closely for visible cocoons, which often appear as small, round, and dark structures.
- Gently remove cocoons: Use tweezers to gently extract the cocoons without harming them or the surrounding material.
- Place in container: Transfer the collected cocoons into your prepared container, ensuring they fit comfortably.
- Label the container: Mark the container with the date and location of collection for future reference.
Follow these steps to ensure successful and safe collection of mason bee cocoons.
Cleaning Mason Bees Cocoons
Cleaning mason bee cocoons enhances their chances of survival by removing debris and parasites. Proper cleaning methods contribute to the health of emerging bees.
Materials Needed for Cleaning
- Soft brush: Use a soft brush to gently clean the cocoons without damaging them.
- Soap: A mild soap solution aids in pest removal.
- Water: Clean water for rinsing is essential.
- Containers: Labelled containers hold cleaned cocoons, preventing mix-ups.
- Gloves: Wear gloves to avoid transferring oils or residues.
Step-by-Step Cleaning Process
- Prepare: Gather all materials needed for the cleaning process.
- Inspect: Examine each cocoon for visible debris or pests.
- Brush: Use the soft brush to remove dirt gently from the surface of the cocoons.
- Wash: Mix a mild soap with water. Dip the brush into the solution and carefully clean each cocoon, ensuring thorough coverage without soaking them.
- Rinse: Rinse the cocoons under clean running water to remove any soap residue.
- Dry: Place the cleaned cocoons on a paper towel or cloth to dry completely.
- Store: Once dry, place the cocoons in cleaned and labelled containers to prevent confusion.
Following these steps promotes the health and safety of mason bees as they emerge in the spring. Regular cleaning boosts their survival rates and supports your local ecosystem.
Storing Mason Bees Cocoons
Storing mason bee cocoons properly ensures their health and readiness for the next generation. Focus on maintaining optimal conditions to protect and support these essential pollinators.
Ideal Storage Conditions
Keep cocoons in a cool, dry place. Ideal temperatures range from 35°F to 45°F. Avoid direct sunlight to prevent overheating and damage. Use well-ventilated containers, such as cardboard boxes or mesh bags, to allow air circulation.
Include some level of humidity control. Use a hygrometer to monitor humidity levels, keeping them between 40% and 60%. If humidity is too high, add silica gel packets to absorb excess moisture. Ensure containers are tightly closed to prevent pests from accessing the stored cocoons.
Store cocoons for winter. Consider placing them in a shaded part of your home or garage. Maintaining stable temperatures and humidity promotes the health of the cocoons and increases the likelihood of successful emergence in the spring.
Duration of Storage
Store mason bee cocoons until spring. Typically, this duration lasts from late fall to early spring. Monitor the storage conditions regularly to maintain optimal health.
Be prepared for different emerging times. Depending on environmental factors, such as local temperatures, adult bees may emerge at varying times. Watch for signs of initial spring warmth as a cue to begin checking the cocoons.
Plan for release coinciding with blooming. Once temperatures consistently reach around 55°F during the day, prepare to release the cocoons into suitable habitats with flowering plants. This timing ensures bees have immediate access to food sources upon emergence.
Signs of Healthy versus Unhealthy Cocoons
Identify healthy cocoons by their appearance. Healthy cocoons display a smooth and shiny exterior, often with a light coloring. These cocoons will feel solid and intact upon gentle handling.
Watch for signs of damage. Unhealthy cocoons may appear dull or cracked, indicating possible exposure to harsh conditions. If you notice any mold growth or discolored spots, this may signify reduced viability.
Check for active larvae. In some cases, open a few cocoons to inspect their contents. Healthy cocoons will contain well-formed larvae, while unhealthy ones may show inactive or dead larvae. Regular assessments help ensure the best chances for survival as the adult bees emerge.
Releasing Mason Bees Cocoons
Proper release of mason bee cocoons enhances their chances of survival and promotes effective pollination. Timing and environmental conditions play critical roles in this process.
Timing for Release
Release mason bee cocoons in mid to late spring when temperatures exceed 55°F and flowers bloom. Assess local flora to determine specific timing, as blooming schedules vary by region. Monitor your garden for early flowers like crocuses, daffodils, and apple blossoms; these attract mason bees. If local flowers bloom sooner than expected, adjust the release date accordingly. Generally, aim for a window between late April and early May for the best results. An optimal release ensures immediate access to pollen and nectar sources, crucial for the survival of emerging adult bees.
Best Practices for Placement
Place mason bee cocoons in a sheltered location to protect from harsh weather and predators. Choose an area that enjoys morning sun; this helps warming cocoons faster and encourages early activity. Position them near existing bee habitats or flowering plants to shorten travel distance. Ensure good airflow around the containers to prevent moisture accumulation. Secure the cocoons in an appropriate nesting box, allowing bees to enter freely. Maintain visibility of nesting boxes, making it easier for you to monitor their activity and ensure safety from potential threats.
Creating a Pollinator-Friendly Environment
Create a welcoming garden space for mason bees by planting various native flowering plants. Select flowers that bloom from early spring through late fall; this provides consistent food sources. Diverse species, such as lavender, sunflowers, and coneflowers, attract different pollinators. Provide shallow water sources like saucers filled with pebbles and water; this supports bees without risking drowning. Avoid using pesticides or herbicides that can harm bees; consider organic alternatives instead. Proper habitat establishment leads to healthier mason bee populations that contribute to your garden's productivity.
Troubleshooting Common Issues
Addressing common issues that arise with mason bee cocoons ensures a healthy population and a successful gardening experience. Here are solutions to three typical problems you might encounter.
Identifying Damaged Cocoons
Identifying damaged cocoons requires careful inspection. Look for discoloration, holes, or irregular shapes that indicate problems. Healthy cocoons appear smooth and shiny. If you find a cocoon that is dull or shows signs of fragmentation, it may be compromised. Ensure you examine each cocoon closely under good lighting. Discard damaged cocoons to prevent unhealthy larvae from affecting others. Visit local extension services or bee conservation organizations for guidelines on handling damaged cocoons. These resources may provide valuable insights on best practices and further assistance.
Dealing with Mold Growth
Dealing with mold growth on cocoons can be critical for their health. If you observe white or green fuzz on the cocoons, act quickly. Remove the affected cocoons from storage to prevent mold from spreading. Use a soft brush to gently clean any visible mold. After cleaning, soak the cocoons in a mild soap solution for a few minutes, then rinse them in clean water. Ensure that you dry the cocoons completely before storage. Store cocoons in a dry area with proper ventilation to minimize mold risks in the future. Regularly inspect cocoons for early signs of mold, enabling timely prevention efforts.
Addressing Pest Infestation
Addressing pest infestation promptly ensures the safety of your mason bee cocoons. Common pests include mites and larvae from other insects. Inspect the cocoons for any signs of pests, such as small moving bugs or webbing around storage areas. If you discover infested cocoons, remove them immediately to safeguard the healthy ones. Utilize natural pest control methods like diatomaceous earth to deter pests when stored. Keep the storage area clean to prevent infestations in the first place. Consider introducing beneficial insects in your garden that prey on pests, promoting a balanced ecosystem while protecting your mason bees.
Helpful Tips for Successful Mason Bee Care
Attracting More Mason Bees to Your Garden
Creating a welcoming environment encourages more mason bees to visit your garden. Provide shelter by installing bee hotels made of natural materials such as wood, bamboo, or hollow stems to mimic their nesting preferences. Plant native flowers that bloom in early spring to supply food sources for bees as they emerge from their cocoons. Choose a variety of flowers to support foraging throughout the season; examples include crocuses, willows, and fruit trees. Avoid using pesticides that can harm bees and their habitat; opt for organic gardening methods instead. Provide shallow water sources like birdbaths with stones or pebbles for bees to land on and drink safely. Create bare patches of soil in your garden as nesting sites for other solitary bees, which can coexist with mason bees, enhancing your garden’s biodiversity.
Seasonal Care for Mason Bee Cocoons
Seasonal care plays a crucial role in mason bee health and productivity. Inspect cocoons regularly to identify any potential issues such as mold or pests. Check your stored cocoons during winter and late winter, keeping them in optimal conditions at temperatures between 35°F and 45°F. Prepare for spring by cleaning and monitoring cocoons, ensuring that they receive adequate airflow to prevent moisture buildup. As the weather warms up, release cocoons when temperatures exceed 55°F, ideally between late April and early May. Position cocoons in a sheltered area that receives morning sun and encourages natural foraging, directing bees toward nearby flowering plants. Regular assessments prevent problems and support healthy mason bee populations, leading to effective pollination within your garden.
Conclusion
Supporting mason bees and their cocoons is essential for thriving gardens and healthy ecosystems. By understanding their life cycle and following proper collection and cleaning techniques, you can significantly boost their survival rates.
Creating a welcoming environment with native plants and proper nesting sites will not only attract these valuable pollinators but also enhance your gardening experience. Regular inspections and optimal storage conditions for cocoons ensure that you're ready for their emergence in spring.
Embracing these practices will lead to a flourishing garden and contribute positively to the local environment. Your efforts in nurturing mason bees will pay off in bountiful blooms and increased yields.
Frequently Asked Questions
What are mason bees and why are they important?
Mason bees are solitary bees belonging to the Osmia genus, known for their exceptional pollination abilities. They are particularly important for early-blooming flowers, boosting fruit and vegetable yields in gardens and agriculture. Unlike honeybees, they gather pollen and nectar to nurture their young, making them vital for local ecosystems.
How do mason bees build their nests?
Mason bees build nests in natural cavities, utilizing mud to create partitions between their brood. They gather pollen and nectar to feed their larvae, and the mud helps protect the young bees during their development.
What is the life cycle of mason bees?
The life cycle of mason bees consists of four stages: egg, larva, pupa, and adult. Understanding this cycle helps gardeners take better care of these bees and ensures their populations thrive.
When should I collect mason bee cocoons?
Collect mason bee cocoons in mid to late spring, typically between April and May, when adult bees emerge and temperatures stabilize above 55°F. This timing ensures the cocoons are ready for storage and eventual release.
How should I clean mason bee cocoons?
To clean mason bee cocoons, you’ll need a soft brush, mild soap solution, and clean water. Gently inspect, brush off debris, wash, rinse, and store the cocoons in labelled containers. Proper cleaning increases their chances of survival.
What are the best conditions for storing mason bee cocoons?
Store mason bee cocoons in a cool, dry place with temperatures between 35°F and 45°F, avoiding direct sunlight. Maintain humidity levels between 40% and 60%, and check storage conditions regularly.
When is the best time to release mason bee cocoons?
Release mason bee cocoons in mid to late spring, ideally between late April and early May, once temperatures exceed 55°F and flowers bloom. This timing provides immediate food sources for the emerging bees.
How can I create a mason bee-friendly environment?
To attract mason bees, plant native flowering plants that bloom in early spring, install bee hotels made from natural materials, provide shallow water sources, and avoid pesticides. Creating bare spots in soil for nesting is also beneficial.
What should I do if I find damaged mason bee cocoons?
Inspect cocoon health regularly to identify any damage. If you find compromised cocoons, clean and store them properly to avoid mold or pest issues. Healthy cocoons will have a smooth exterior and well-formed larvae.
Why are regular inspections of mason bee cocoons important?
Regular inspections help ensure the health and readiness of mason bee cocoons for the next generation. Monitoring conditions and identifying issues early can significantly boost survival rates as adult bees emerge in spring.

Leave a comment