How to Identify and Manage Beehive Queen Cells for a Thriving Hive
In the fascinating world of beekeeping, understanding the role of the queen cell is crucial for maintaining a thriving hive. The queen cell is a unique structure where new queen bees are nurtured, ensuring the colony's survival and productivity. Without a healthy queen, a hive can quickly decline, making your knowledge of this vital component essential.
When you spot a queen cell in your hive, it’s a sign that the bees are preparing for a significant change. Whether it’s swarming or replacing an aging queen, recognizing the different types of queen cells can help you make informed decisions for your colony. By diving into this topic, you'll gain insights into the lifecycle of bees and the importance of the queen's role, empowering you to be a more effective beekeeper.
Understanding Beehive Queen Cell
Beehive queen cells serve a critical function in the life cycle of a hive. These specialized cells house the larval bees that will develop into queen bees. Understanding their purpose and how to identify them is vital for effective beekeeping.
Identifying Queen Cells
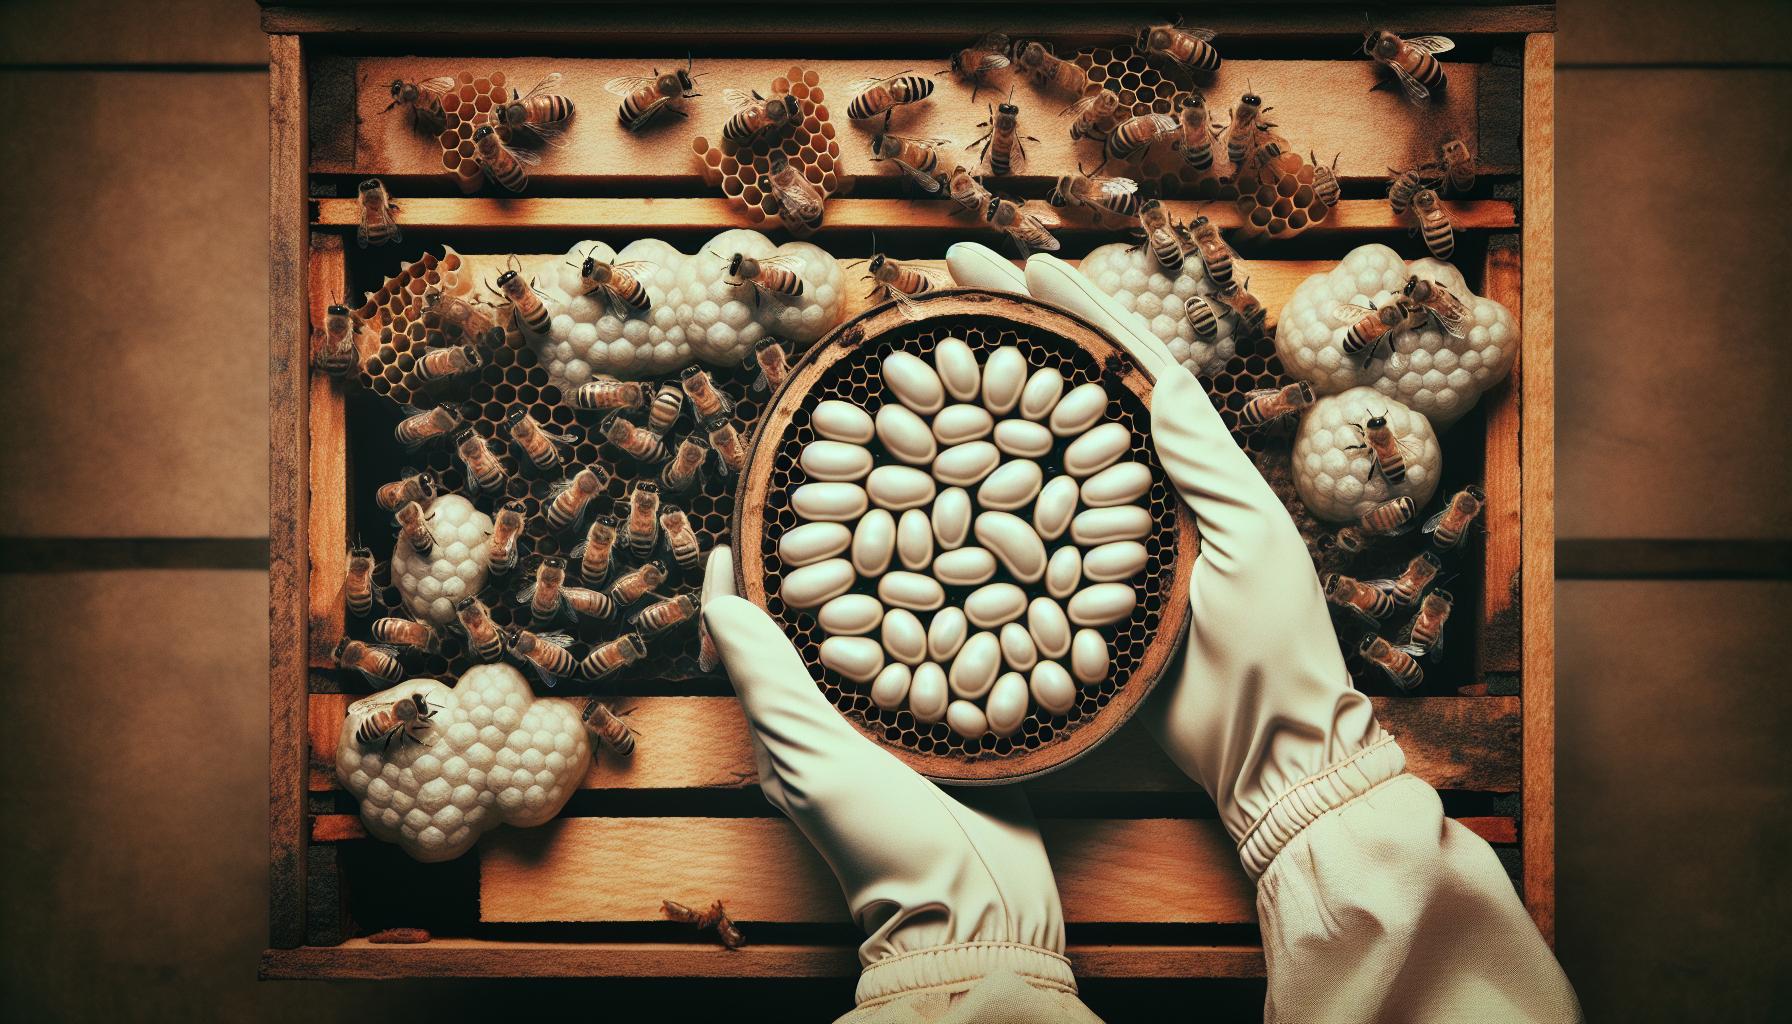
- Appearance: Queen cells look like elongated peanuts. They hang vertically, often found on the edges or lower sides of frames.
- Location: Inspect frames in the brood chamber. Queen cells appear in areas with active brood and usually cluster together.
- Development Stage: Check the age of queen cells. Eggs or very young larvae indicate the start of development. Mature queen cells appear fuller and may have caps.
Importance of Queen Cells
- Colony Reproduction: Queen cells signify that the colony is preparing for reproduction through swarming. This ensures genetic diversity and stronger hives.
- Queen Replacement: Aging or sick queens lead to the formation of queen cells. This process allows the colony to replace the queen before issues impact hive health.
- Emergency Scenarios: Queen cells also appear in emergencies, such as queen loss, prompting swift colony recovery.
Monitoring Queen Cells
- Regular Inspections: Inspect hive frames every 7 to 14 days, especially during swarming season. Regular checks help catch queen cell formations early.
- Assessing Colony Health: Observe queen cells to gauge colony well-being. Healthy colonies produce multiple queen cells, while struggling colonies might show fewer.
- Management Decisions: Depending on the number and type of queen cells, you can decide to allow swarming, perform splits, or replace a queen.
Actions on Queen Cells
- Leave Cells Intact: If the colony produces multiple queen cells, allow nature to take its course. The strongest queen will emerge and provide stability.
- Select For Breeding: Consider selecting queen cells for breeding purposes. Choose well-developed and healthy cells for favorable traits.
- Remove Unwanted Cells: If swarming is not desired, remove excess queen cells while maintaining a few to allow natural queen development.
Understanding beehive queen cells enhances your beekeeping practice. Recognizing their presence fosters better hive management and overall colony health.
Identifying Queen Cells in a Beehive
Identifying queen cells in a beehive is essential for effective beekeeping. Understanding their structure and significance plays a vital role in managing bee colonies.
What Are Queen Cells?
Queen cells are specialized structures that bees construct for raising new queen bees. Shaped like large peanut shells, these cells are often found in the hive's brood area. Unlike regular worker cells, queen cells hang vertically and differ in size. These cells contain an egg or larva that the colony raises into a queen. The cells can vary in appearance based on their developmental stage, with newly built cells appearing pearly and white. Mature queen cells turn darker and may show a tapered end as they approach readiness.
Importance of Queen Cells in the Hive
Queen cells serve critical functions within the hive. They facilitate the colony's reproductive process by nurturing new queens that will either replace an aging queen or swarm. Monitoring queen cell formation helps you assess colony health and responsiveness to potential swarming behavior. Presence of multiple queen cells often indicates that the hive may prepare to split, while a single cell can signal an impending queen replacement. Additionally, in cases where the queen dies unexpectedly, queen cells provide a backup for colony survival. Regular inspections focused on queen cell development guide your management strategies and ensure hive stability.
Materials Needed for Beehive Inspection
Gathering the right materials for a beehive inspection ensures a thorough evaluation of the hive's condition. Adequate preparation enhances safety and efficiency throughout the inspection.
Essential Tools for Inspection
- Hive Tool
Use a hive tool to pry apart hive components and scrape away excess propolis. This tool aids in inspecting frames and checking for queen cells.
- Smoker
Apply a smoker to calm bees during the inspection. The smoke masks alarm pheromones, reducing aggressive behavior.
- Bee Brush
Employ a bee brush to gently remove bees from frames without harming them. This brush facilitates a clear view of the frames and queen cells.
- Frames with Foundation
Use frames that contain foundation for creating new comb if needed. Fresh foundation helps the colony expand when growing queen cells.
- Queen Excluder
Incorporate a queen excluder if necessary to keep the queen contained while inspecting the brood area. This device prevents her from laying eggs in unwanted locations.
Safety Gear for Beekeeping
- Bee Suit
Wear a full bee suit to protect against stings. A well-fitted suit covers the entire body and includes a veil.
- Veil
Put on a veil for face protection during inspections. The veil offers visibility while safeguarding against bee attacks.
- Gloves
Use gloves that fit snugly to shield your hands from stings. Beekeeping gloves should be comfortable while allowing dexterity.
- Closed-Toed Shoes
Choose closed-toed shoes to protect your feet from accidental stings. Sturdy footwear is ideal for sturdy footing during inspections.
- Smoke Resistant Clothing
Consider wearing smoke-resistant clothing when working with the smoker. This type of clothing reduces the risk of igniting materials accidentally.
Gathering these materials before each inspection promotes a safe and effective check of the hive's health and queen cell development.
The Process of Inspecting for Queen Cells
Effective inspections for queen cells play a vital role in beekeeping. Regular checks of your hive ensure awareness of the colony's health and reproductive status. Follow these steps for successful inspections.
Timing Your Inspection
Inspect hives every 7 to 14 days during the active season. Optimal times occur during warm days when bees are active and foraging. Early afternoon offers the best weather conditions, as most bees are outside the hive, reducing disturbance. Avoid inspecting during bad weather or after rainfall since bees are more defensive and less cooperative. Keep track of your colony's behavior. Signs such as increased buzzing or clustering near the entrance indicate that an inspection is necessary, especially if swarming is a concern.
How to Open a Beehive
Approach your hive slowly to avoid startling the bees. First, use a smoker to produce calmness among the bees. Puff smoke at the hive entrance and along the seams of the hive. Wait a few moments before opening. Carefully lift the outer cover, ensuring minimal disturbance to the bees. Use your hive tool to pry apart boxes, if necessary, while taking care not to crush any bees. Maintain a steady grip on the frames to avoid dropping or tilting them. Always work methodically to quickly resume a stable environment for the bees.
Locating Queen Cells in the Hive
Locate queen cells by checking frames within the brood area. Look for frames that contain open brood, capped brood, or eggs. Queen cells resemble large peanut shells and are typically found on the bottom or sides of frames. Inspect each frame thoroughly, identifying the different stages of queen cell development. Newly built queen cells appear pearly white and are easy to identify. As development progresses, they darken and take on a tapered shape. If multiple queen cells exist, monitor for possible swarming or supersedure, which indicates a change in the hive's reproductive strategy. Regular checks enable prompt actions if a queen must be replaced or if swarming is imminent.
Managing Queen Cells
Managing queen cells involves making informed decisions that support colony health and productivity. Proper handling ensures your beehive remains stable, resulting in a thriving environment for bees.
Choosing to Raise a New Queen
Choosing to raise a new queen begins with evaluating the colony's needs. Assess the current queen's performance and colony dynamics. If the queen shows low egg-laying activity or the colony faces threats like disease, raising a new queen becomes essential. To raise a queen, select healthy queen cells or create new ones by grafting larvae into artificial queen cups. Make timely decisions to ensure optimal outcomes. Monitor the development of chosen cells and prepare for any challenges ahead.
If multiple queen cells exist, monitor for signs of swarming. If swarming is imminent or desired, allow the bees to raise the new queen from existing cells. If you prioritize maintaining a queen in the hive, remove excess cells to prevent swarming and select one to raise. Ensure you understand the colony's needs to make educated decisions.
How to Remove Queen Cells
How to remove queen cells requires careful attention to detail and timing. Begin inspecting the hive every 7 to 14 days during the active season. Identify frames containing queen cells and assess their development. Use your hive tool to gently pry apart frames and locate the cells.
Remove queen cells once you determine which cells to eliminate. Use scissors or a similar tool to cut the cells from the frame. It is important to minimize damage to surrounding brood. Transport removed cells away from the hive to prevent confusion among the bees. Observe the remaining cells to allow the colony to mature a new queen if necessary. Make your removal decisions based on the overall health and productivity of the hive.
Supporting Queen Cell Development
Supporting queen cell development encourages healthy and productive queens. Provide the right environment and resources. Ensure plenty of bee bread and honey for nourishment as larvae develop into queens. Maintain a strong supporting worker bee population to care for the new queen.
Regularly monitor humidity and temperature levels in the hive. The appropriate climate promotes healthy cell development. Additionally, avoid disturbances during early queen development stages, which ensures the colony remains focused on rearing the new queen. Evaluate the levels of pheromones in the hive and consider moving the original queen if necessary. This creates a calm atmosphere for successful queen rearing.
Troubleshooting Common Issues with Queen Cells
Addressing problems with queen cells ensures successful colony management. Identifying and resolving these issues promotes healthier hives.
Poor Queen Cell Development
Poor Queen Cell Development can arise from several factors that hinder the successful raising of new queens. One factor involves inadequate feeding of the colony. Without sufficient resources, worker bees cannot produce quality royal jelly necessary for nurturing larvae into queens. Inspect food stores regularly and, when needed, provide syrup or pollen substitutes.
Another reason for poor development results from environmental stressors. Temperature fluctuations can adversely affect brood conditions. Maintain a stable hive environment by protecting it from harsh weather.
Additionally, stress within the colony due to overcrowding or disease can impact queen cell quality. Monitor colony health and ensure ample space for bees. Remove any signs of pests or illness immediately. Performing routine inspections every 7 to 14 days allows for the early detection of these issues before they escalate, ensuring robust queen cells and a healthy hive.
Issues with Worker Acceptance
Issues with Worker Acceptance of newly raised queens can lead to significant problems within the hive. A common reason for rejection involves the queen's unfamiliar scent. When a colony raises a queen, the workers may not accept her if they do not recognize her pheromone. To address this, introduce a mated queen gently by using a cage for a few days. This method allows workers to familiarize themselves with her scent before full acceptance.
Another factor relates to colony strength. Weak colonies often struggle to accept new queens due to lower populations of nurse bees. Ensure colonies stay strong by monitoring brood patterns and worker populations. If needed, combine weaker colonies with stronger ones to improve acceptance chances.
Lastly, if the existing queen shows signs of decline, worker bees may reject a new cell in favor of retaining the old queen. Regularly evaluate the queen's performance and consider timely interventions to prevent this outcome, supporting overall colony health and harmony.
Helpful Tips for Successful Queen Rearing
- Choose the Right Time: Timing affects queen rearing success. Use the spring and early summer months for starting new queen cells, as conditions favor strong bee activity and colony growth.
- Select Healthy Bees: Ensure you select strong and healthy bees for queen rearing. Observe their behavior and brood pattern. Choose a colony with no signs of disease or weakness.
- Provide Ample Resources: Ensure sufficient food supply in the hive. Provide sugar syrup or honey frames to support the colony during queen rearing. Strong worker bees are essential for nurturing queen cells.
- Manage Space Effectively: Prevent overcrowding by providing enough space within the beehive. Consider adding supers if the colony is expanding rapidly, as excess space supports queen cell development.
- Utilize Proper Methods: Use reliable techniques for queen cell rearing. Grafting and cell cups are popular methods; select the one that suits your experience and resources. Each method offers unique advantages.
- Ensure Good Ventilation: Maintain proper airflow within the hive. Good ventilation protects against excess moisture and promotes a healthy environment for developing queen cells.
- Monitor Development: Regularly check the progress of queen cells. Look for signs of readiness, such as the presence of well-formed queen cells with larvae or pupae.
- Isolate Queen Cells: Separate queen cells intended for different colonies. Use a queen cell protector or cage to prevent damage and optimize acceptance by the new colony.
- Observe Behavior Patterns: Pay attention to the worker bees' response to new queen cells. Quick acceptance by worker bees indicates a healthy colony dynamic.
- Stay Informed: Continually educate yourself on queen rearing practices. Attend workshops or read up-to-date resources on beekeeping to refine your skills and adapt practices as needed.
- Keep Detailed Records: Maintain a beekeeping journal to document observations, dates, and colony behaviors. This information aids in improving your methods over time.
- Practice Patience: Give new queens time to establish themselves. Allow a few weeks for workers to accept the new queen fully before making changes within the colony.
Following these tips supports effective queen rearing while enhancing the overall health and productivity of your hive.
Conclusion
Understanding queen cells is essential for effective beekeeping. By recognizing their importance in colony health and productivity, you can make informed decisions that benefit your hive. Regular inspections and monitoring of queen cell development allow you to address potential issues before they escalate.
By applying the tips and techniques discussed, you’ll enhance your skills in queen rearing and hive management. This not only supports the well-being of your bees but also contributes to the overall success of your beekeeping endeavors. Stay proactive and keep learning to ensure your hive thrives.
Frequently Asked Questions
What are queen cells in beekeeping?
Queen cells are special structures in a beehive where new queen bees are developed. They resemble large peanut shells and contain either an egg or a larva that the colony nurtures into a queen. Recognizing queen cells is vital for beekeepers to manage hive health and anticipate behaviors like swarming or replacing an old queen.
Why are queen cells important for bee colonies?
Queen cells play a crucial role in bee colony reproduction and the replacement of aging queens. Monitoring their formation helps beekeepers assess colony health. Multiple queen cells can indicate potential swarming, while a single cell often signifies an impending replacement of the existing queen.
How can I identify queen cells?
To identify queen cells, look for their elongated, peanut-like shape located in the brood area of the hive. Newly built queen cells appear pearly white, while mature cells turn darker and more tapered. Regular hive inspections will help beekeepers spot these cells efficiently.
What tools do I need for inspecting queen cells?
Essential tools for inspecting queen cells include a hive tool for opening the hive, a smoker to relax the bees, a bee brush for gently moving bees, and frames with foundation for new comb. Safety gear, such as a bee suit and gloves, is also necessary for protection during inspections.
How often should I inspect for queen cells?
It is recommended to inspect for queen cells every 7 to 14 days during the active beekeeping season. Inspections should be performed on warm days, ideally in the afternoon, to minimize stress on the bees and ensure a thorough check of the hive.
What should I do if I find queen cells?
If you find queen cells, evaluate their purpose. Assess whether the colony needs a new queen or if swarming is imminent. Depending on the situation, you can choose to support queen cell development or remove excess cells to manage the hive’s population effectively.
How do you ensure successful queen rearing?
Successful queen rearing involves timing, selecting healthy bees, and providing adequate resources. Beekeepers should manage space effectively, isolate cells for different colonies, and monitor the development of queen cells while observing worker bee behavior to ensure harmony within the hive.
What common issues can affect queen cell development?
Common issues that may hinder queen cell development include inadequate feeding, environmental stress, and overcrowding. Regular hive inspections help detect these problems early, allowing beekeepers to address them and improve the chances of successfully raising new queens.
Enhance Your Beekeeping Skills Today!
Ready to elevate your beekeeping expertise? By mastering the art of identifying and managing queen cells, you’ll be better equipped to guide your colony through swarming, queen replacement, and hive expansion. Dive deeper into this essential beekeeping knowledge and ensure your hive thrives.
Stay ahead of the hive’s natural rhythms—subscribe for more expert tips, practical advice, and in-depth guides to keep your beekeeping journey buzzing with success!
Click here to learn more and transform your beekeeping skills.

Leave a comment