Managing Your Queen Cell Beehive for a Healthy Bee Colony
In the fascinating world of beekeeping, understanding the role of queen cells is crucial for maintaining a healthy hive. These specialized structures are where new queens develop, ensuring the colony's survival and productivity. Whether you're a seasoned beekeeper or just starting out, knowing how to manage queen cells effectively can make all the difference in your hive's success.
Understanding Queen Cell Beehives
Understanding queen cell beehives helps you manage bee colonies effectively. Queen cells play a critical role in the lifecycle of honeybees. They provide a way to raise new queens and maintain colony health.
What Is a Queen Cell Beehive?
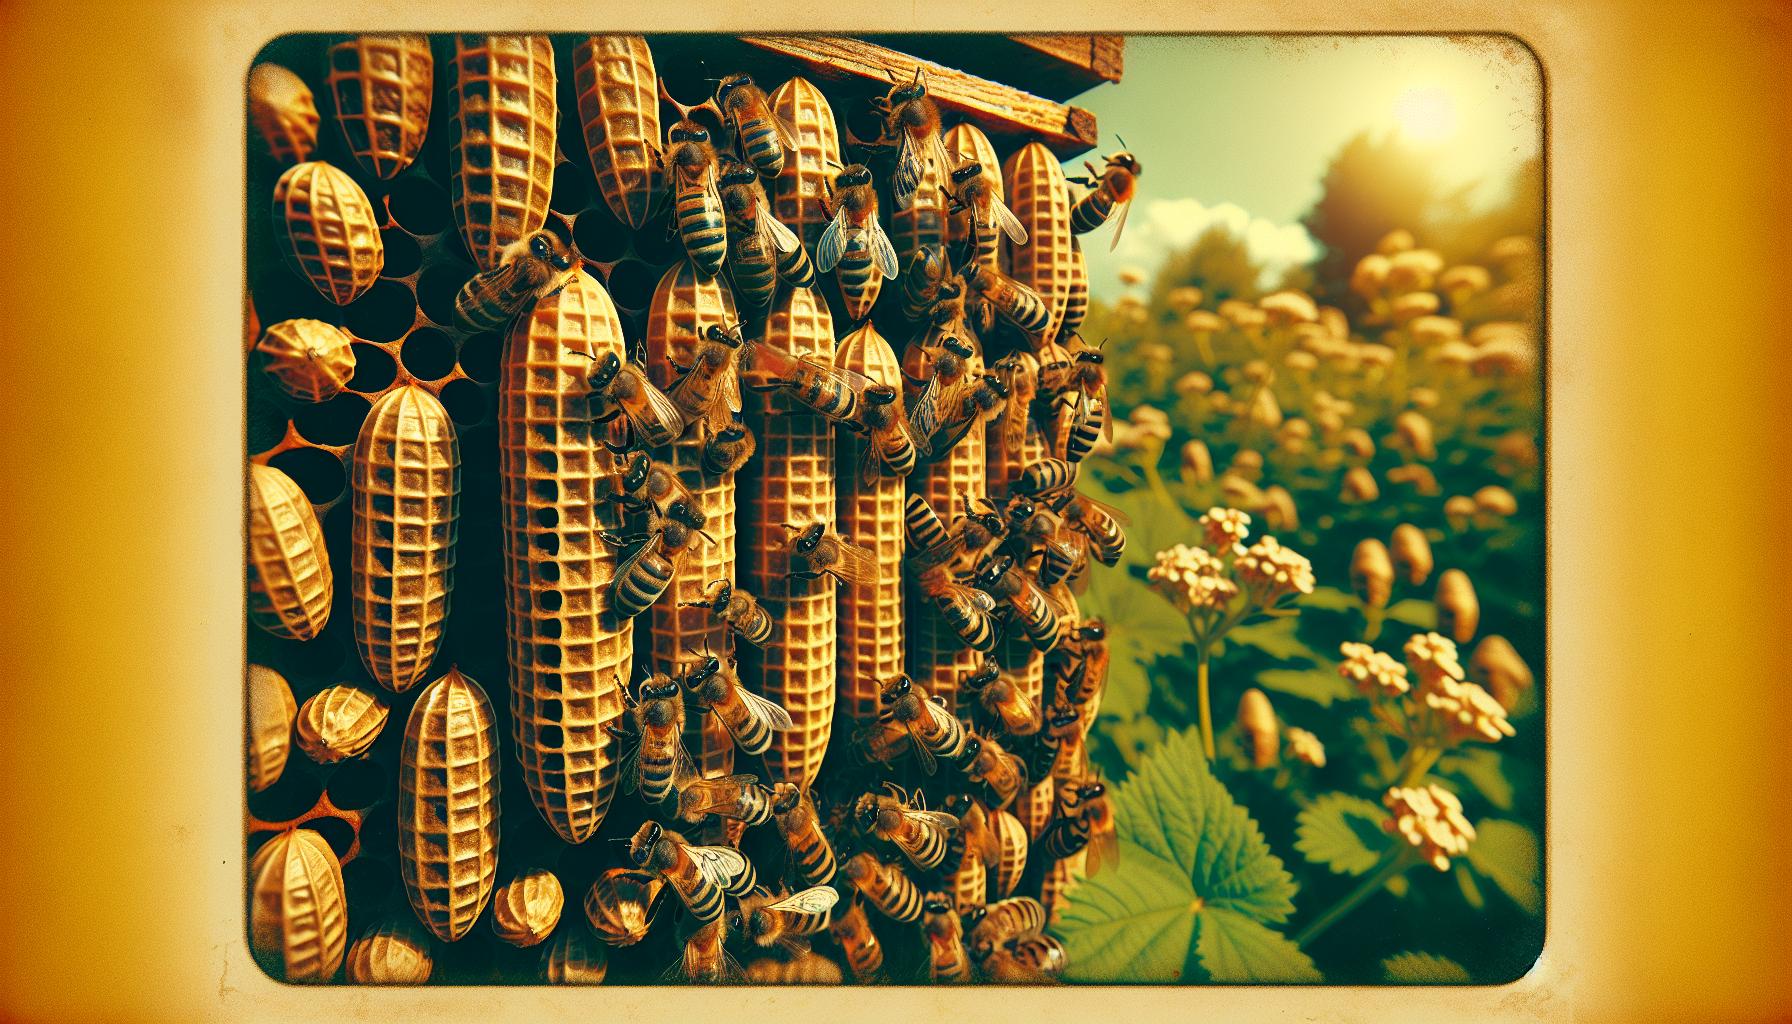
A queen cell beehive refers to the specific structures where honeybee queens develop. These cells appear as elongated, peanut-shaped formations hanging vertically from the hive's comb. Worker bees create queen cells when they identify the need for a new queen, often due to an aging queen or colony expansion. The queen cell contains an egg or young larva, allowing the bees to nurture it into a mature queen. Observing these cells in your hive signals a vital stage in colony reproduction and health management.
Importance of Queen Cells in Beekeeping
Queen cells serve several important functions in beekeeping. First, they ensure colony continuity by allowing the current queen to be replaced when necessary. Strong colonies depend on a healthy queen, as she lays thousands of eggs daily. Second, the presence of queen cells indicates that your colony may be preparing to swarm. This knowledge helps you plan for managing swarming behavior. Lastly, understanding the lifecycle of queen cells assists you in monitoring hive dynamics and making informed decisions for hive management. Keeping a close eye on queen cells contributes to the overall productivity and success of your beekeeping efforts.
Materials Required
Gathering the correct materials ensures effective management of queen cells in a beehive. Use the following lists to know what is necessary and what might enhance your beekeeping process.
Essential Materials
- Queen cell cups – These structures foster the growth of queen larvae, essential for developing new queens.
- Beekeeping tool kit – A set including a hive tool, smoker, and bee brush aids in hive management.
- Wax – Used to coat queen cups to encourage bees to use them.
- Bee larvae – Young larvae to place in queen cell cups for queen development.
- Nucleus hive – A smaller hive that can house worker bees and the new queen during her development.
Optional Materials
- Pollen patty – Supplementary food for bees to ensure a healthy diet while they care for the queen cells.
- Queen rearing colony – A strong colony that can provide the necessary support and workforce for raising queens.
- Apiary notebook – Documenting observations and progress can help manage queen cell development more effectively.
- Sugar syrup – A source of energy for bees, particularly important when feeding them during queen cell production.
- Thermometer – Monitoring hive temperature ensures optimal conditions for the development of queens.
Tools Needed
To effectively manage queen cells, specific tools enhance your beekeeping experience. These tools fall into basic and advanced categories.
Basic Tools
- Queen Cell Cups: Use queen cell cups to provide a suitable environment for larvae. These cups mimic natural queen cells.
- Beekeeping Tool Kit: Keep a tool kit that includes a hive tool, smoker, and gloves. These tools ensure safety and assist in hive management.
- Wax: Utilize wax for building queen cells. Wax is essential for maintaining optimal growth conditions for young queens.
- Bee Larvae: Obtain bee larvae, ideally between 24 to 48 hours old, for queen rearing. Fresh larvae lead to healthier queens.
- Nucleus Hive: Set up a nucleus hive as a place for developing queens. It provides a stress-free environment for growth.
Advanced Tools
- Pollen Patties: Incorporate pollen patties to support larvae growth. These patties provide essential nutrients for young queens.
- Queen Rearing Colony: Establish a queen rearing colony for optimal conditions. This colony assists with proper care and feeding of queens.
- Apiary Notebook: Maintain an apiary notebook to track queen development and hive health. Documenting changes aids in better decision-making.
- Sugar Syrup: Prepare sugar syrup to nourish larval bees. Mix one part sugar with one part water for optimal results.
- Thermometer: Use a thermometer to monitor hive temperature. Keeping the hive at the right temperature promotes healthy queen development.
By gathering these tools, your efforts in managing queen cells in beehives become more effective and organized.
Setting Up a Queen Cell Beehive
Setting up a queen cell beehive involves strategic steps to ensure success. These steps include selecting the right location, preparing the hive, and carefully introducing the queen cells.
Choosing the Right Location
Choosing a suitable location for your queen cell beehive supports optimal growth. Look for an area with ample sunlight and minimal wind exposure. Select a spot that provides some shade during the hottest part of the day, which helps maintain a stable temperature. Ensure proximity to water sources, as bees require water for various activities in the hive. Consider placing the hive near flowering plants or a garden, as these areas provide a continuous pollen and nectar supply. Avoid placing the hive near potential disturbances, such as heavy traffic or loud noises. A quiet and calm environment fosters a healthy hive.
Preparing the Hive
Preparing the hive requires several key actions to create a conducive environment for queen cells. Start by assembling the nucleus hive, ensuring it has proper ventilation and insulation. Add a layer of clean beeswax to the frames to encourage bees to build the queen cells. Place the queen cell cups in the frames, securing them tightly to prevent any movement. Fill the hive with young bee larvae from your existing hives, providing a foundation for the development of new queens. Monitor the moisture levels inside the hive, ensuring they remain stable. If necessary, add a moisture-absorbing material to prevent excess humidity. Inspect the hive regularly for signs of disease or pests and take prompt action as needed.
Introducing the Queen Cells
Introducing the queen cells presents a critical step in hive management. Wait until the queen cells reach a suitable age, typically around 10 days after egg laying. Carefully transfer the queen cells into the nucleus hive, ensuring no damage occurs during the process. Space the cells apart to reduce competition among developing queens. After introduction, monitor the hive closely, checking for any signs of activity or acceptance by the worker bees. If the workers initiate care of the new queens, success increases significantly. Keep track of the queens as they mature, planning for eventual mating and colony expansion. This careful management fosters a strong future for your beekeeping operation.
Managing the Queen Cell Beehive
Effective management of queen cell beehives ensures strong colonies. By focusing on monitoring, handling, and feeding, you cultivate a robust environment for queen development.
Monitoring the Queen Cells
Monitoring queen cells involves regular inspections for signs of growth and health. Check the queen cells every seven days to assess their condition. Look for any abnormalities, such as cell damage or inactivity. Healthy queen cells appear smooth and well-formed. Count the number of queen cells to gauge the colony's potential for swarming or requeening. Observe the surrounding bees for behavior changes. Increased activity around the cells may indicate a successful development process. Document your observations to track trends and make informed decisions. If you notice fewer queen cells than expected, reassess hive conditions and ensure the presence of sufficient resources. Keeping accurate records allows for better hive management and future planning.
Handling Worker Bees
Handling worker bees requires caution and respect. Begin by preparing your tools and equipment before opening the hive. Use a smoker to calm the bees, minimizing aggression. Approach the hive quietly to avoid startling them. When inspecting for queen cells, carefully lift frames without squashing bees. If you encounter resistance, pause until the bees settle. Avoid using excessive force or sudden movements. If the queen cells are clustered, navigate gently around them. After inspection, return frames to their original positions promptly to reduce stress. If you need to relocate a colony, use a brooding box to minimize disruptions. Ensure that you always wear protective gear to safeguard against stings, especially in an active environment.
Feeding the Beehive
Feeding the beehive supports healthy queen development. Provide sugar syrup as a primary food source, especially during early spring or times of nectar scarcity. Mix a 1:1 ratio of sugar to water and apply it in a feeder. Monitor consumption levels and refill as needed. Pollen patties are another valuable food source, providing essential protein for brood development. Place patties directly on hive frames during active feeding periods. If the hive is weak or new, consider offering protein supplements for enhanced growth. Use observation to adjust feeding practices based on bee activity and brood expansion. Regular feeding fosters a vigorous colony and supports optimal conditions for creating new queens.
Common Techniques for Success
Beekeepers can implement several techniques to effectively manage queen cell beehives. Understanding these methods leads to thriving colonies and successful queen development.
Grafting Queen Cells
Grafting enables you to transfer larvae into queen cell cups. Follow these steps for successful grafting:
- Select young larvae: Choose larvae no more than 24 hours old for optimal results. Ensure they come from healthy, productive colonies.
- Prepare queen cell cups: Use clean, waxed queen cups to ensure hygiene and avoid contamination.
- Transfer larvae: Using a fine grafting tool, carefully remove the selected larvae and place them into the prepared cups. Maintain a steady hand to avoid damage.
- Place cups in a queen-rearing colony: Insert the grafted cups into a queen-rearing colony that has young nurse bees available. Ensure the queen is not present in this colony.
- Monitor progress: Observe the grafts regularly, ideally every 7 days, for signs of healthy queen cell development.
Grafting promotes the creation of multiple queens, which enhances colony productivity.
Cell Finishing Techniques
Cell finishing strengthens queen cells during the last stages of development. Implement these techniques for successful finishing:
- Provide optimal conditions: Maintain consistent temperature and humidity within the queen-rearing colony. This ensures larvae thrive.
- Monitor food supply: Ensure nurse bees have access to adequate pollen and sugar syrup, as these are crucial for queen cell nutrition.
- Limit disturbances: Minimize hive inspections during the finishing process to reduce stress on the bees. Frequent disturbances can negatively impact development.
- Remove excess cells: As cells mature, consider culling any excess queen cells. Limiting competition allows remaining cells to receive more resources.
- Introduce cells to mating nucs: Once cells are capped, transfer them to mating nucs for further growth. Selecting nucs with adequate worker bees supports the young queens.
Employing these cell finishing techniques ensures strong, robust queens ready for mating and colony leadership.
Troubleshooting Common Issues
When managing queen cell beehives, issues may arise that can pose challenges to your colony's health. Recognizing and responding effectively to these problems supports the success of your beekeeping venture.
What to Do If Queen Cells Are Abandoned
Inspect for potential reasons for abandonment. Factors like insufficient worker bees, lack of food, or disease can contribute to this issue. Examine the hive environment for these indicators. If you find a lack of resources, provide supplemental feeding with sugar syrup or pollen patties to reinvigorate the colony's activity.
Introduce a new queen cell if necessary. If the original queen cells remain abandoned, consider replacing them with new cells from a healthy hive. Ensure the new cells are properly introduced by following established guidelines that minimize disturbance.
Monitor the hive closely. Regular checks every few days ensure that your interventions are effective. Document changes in activity and address any ongoing issues promptly. This attention improves the chances of successful queen production and colony recovery.
Identifying and Resolving Bee Aggression
Evaluate hive conditions that might trigger aggression. Factors such as high temperatures, inadequate space, or disturbances can lead to increased bee aggression. Check for overcrowding and ensure adequate ventilation.
Employ calming techniques during inspections. Use a smoker to create a calming effect among the bees during hive checks. Maintain gentle movements when handling frames to avoid startling the bees further.
Check for signs of disease or pests. Aggressive behavior often indicates stress within the colony. Signs of disease or pest infestations can provoke bees. Conduct thorough inspections for pests like Varroa mites or signs of foulbrood. Promptly treat any identified issues to restore hive harmony.
Dealing With Low Hive Activity
Assess environmental factors impacting hive activity. Consider the season and local flora availability. Lack of nectar sources during certain times of the year can lead to decreased bee activity. Ensure that there are nearby blooming plants.
Examine the queen's health. A failing or old queen may result in reduced worker bee activity. Inspect for healthy brood patterns, and if brooding is insufficient, consider requeening the hive to stimulate increased productivity.
Introduce supplemental feeding to enhance activity. Feeding sugar syrup or protein patties can boost energy levels within the hive. Offer these supplements especially during periods of low nectar flow, encouraging better foraging behavior and hive vitality. Monitor results and adjust feeding strategies based on observed activity changes.
Helpful Tips for Beekeeping
Understanding effective beekeeping practices ensures healthy hives and productive colonies. Apply these tips for optimal management and success.
Best Practices for Hive Management
- Regular Inspections: Conduct hive inspections every seven days. Regular checks allow you to monitor queen cell development and overall hive health.
- Maintain a Clean Environment: Keep the hive area free of debris and pests. A clean environment reduces disease risk and supports bee activity.
- Proper Hive Placement: Choose a location with direct sunlight and protection from strong winds. This placement encourages healthy bee behavior and optimal foraging.
- Provide Adequate Food: Supplement the hive with sugar syrup and pollen patties as necessary. This feeding ensures bees have enough resources, especially in times of scarcity.
- Document Observations: Keep an apiary notebook for recording hive inspections. Documentation helps track queen development and identify patterns over time.
- Gentle Handling: Use a smoker to calm bees during inspections. Handle frames gently to minimize stress and maintain hive stability.
Seasonal Considerations
- Spring Preparation: Prepare hives for the active season. Inspect for queen cells and assess colony strength as the weather warms.
- Summer Management: Monitor colonies closely as they are active. Ensure adequate food supplies and check for swarming behavior.
- Fall Readiness: Begin preparing hives for winter. Reduce hive entrances and ensure bees have sufficient honey stores for survival.
- Winter Care: Protect hives from harsh conditions. Wrap hives for insulation and check food levels to prevent starvation during cold months.
- Adapt to Climate Changes: Stay informed about local climate patterns. Adjust management practices to address changes that may affect bee health and activity.
- Seasonal Tools: Use seasonal equipment appropriately, such as entrance reducers in winter and honey supers in summer, to support hive needs throughout the year.
Conclusion
Managing queen cell beehives is essential for the success of your beekeeping operation. By understanding the importance of queen cells and utilizing the right tools and techniques, you can foster healthy queen development and maintain strong colonies. Regular inspections and careful handling will ensure the well-being of your bees while addressing any challenges that arise.
Implementing best practices like proper hive placement and seasonal preparations will further enhance your hive's productivity. With dedication and attention to detail, you can create a thriving environment for your bees, ensuring a prosperous beekeeping journey. Embrace these strategies to support your colonies and enjoy the rewards of effective beekeeping.
Frequently Asked Questions
What are queen cells in beekeeping?
Queen cells are specialized hexagonal structures where honeybee queens develop. Created by worker bees, they contain an egg or young larva that matures into a queen. Their presence is crucial for ensuring the colony's continuity and overall health.
Why are queen cells important for the hive?
Queen cells are essential as they allow for the creation of new queens, which ensures colony survival during swarming or when the current queen is lost. They also play a significant role in maintaining hive productivity and health.
How can beekeepers manage queen cells effectively?
To manage queen cells effectively, beekeepers should regularly inspect them, document their growth, and handle them carefully. Providing the right environment and conditions, like supplemental feeding, can enhance queen cell development.
What materials do beekeepers need for managing queen cells?
Essential materials for managing queen cells include queen cell cups, a beekeeping tool kit, wax, bee larvae, and a nucleus hive. Optional materials like pollen patties, sugar syrup, and a thermometer can enhance the process.
What strategic steps should be followed to set up a queen cell beehive?
Setting up a queen cell beehive involves selecting a suitable location, preparing the hive with wax and young bee larvae, and carefully introducing the queen cells. Timing and gentle handling are crucial for successful acceptance by worker bees.
How often should beekeepers inspect queen cells?
Beekeepers should inspect queen cells every seven days to monitor growth and health. Regular checks help ensure proper development and allow for timely interventions if any issues arise.
What techniques help in managing queen cell beehives?
Techniques such as grafting queen cells and cell finishing can enhance queen productivity. Grafting involves transferring young larvae to queen cell cups, while cell finishing maintains optimal conditions during the final development stage.
What troubleshooting tips are there for queen cell management?
If queen cells are abandoned, inspect for causes like insufficient worker bees or food shortages. Consider supplemental feeding or introducing new queen cells if necessary. Monitoring hive conditions helps identify and resolve issues related to aggression or low activity.
What are some best practices for beekeeping?
Best practices for beekeeping include regular inspections, maintaining a clean hive environment, and providing adequate food. Beekeepers should document observations and handle bees gently to minimize stress while adapting to seasonal changes.

Leave a comment