Easy Steps on How to Get Beeswax from Honeycomb at Home
If you’ve ever marveled at the beauty of honeycomb, you might be curious about the golden substance that bees create. Beeswax, a natural and versatile material, has been treasured for centuries for its numerous uses, from candles to cosmetics. Extracting beeswax from honeycomb not only allows you to enjoy its benefits but also connects you to the fascinating world of beekeeping.
How To Get Beeswax From Honeycomb
Extracting beeswax from honeycomb involves a few straightforward steps. Following this process ensures a clean and efficient extraction of beeswax.
Step 1: Gather Necessary Materials
Collect necessary items for the extraction process. You will require:
- Honeycomb sections
- A double boiler or saucepan
- A strainer or cheesecloth
- Container for beeswax
- Water
Step 2: Prepare the Honeycomb
Cut the honeycomb into small pieces. This increases the surface area of the honeycomb, facilitating the extraction process. Remove any excess honey by gently scraping the pieces with a spatula or knife.
Step 3: Heat the Honeycomb
Place your double boiler on the stove and fill the bottom pot with water. Add the honeycomb pieces to the top pot. Heat on low to medium heat. The gradual heating melts the beeswax without risking scorched flavors.
Step 4: Strain the Mixture
As the honeycomb melts, the beeswax separates from the honey and other impurities. After several minutes of heating, you will notice a clear liquid forming. Use a strainer or cheesecloth to strain the mixture into a separate container. This action removes residual honey and debris.
Step 5: Collect the Beeswax
Allow the strained liquid to cool. As it cools, beeswax solidifies at the top. Once solidified, remove the chunk of beeswax. If necessary, break it into smaller pieces for easier storage.
Step 6: Clean Up
Dispose of any leftover honeycomb remnants responsibly. Clean your equipment with warm water to remove any sticky residue.
Tips for Successful Extraction
- Monitor the temperature carefully during the heating process to avoid burning the beeswax.
- If you want purified beeswax, repeat the straining process.
- Store beeswax in a cool, dry place to maintain its quality.
Following these steps lets you efficiently extract beeswax, suitable for various uses such as candle-making and natural cosmetics. Enjoy working with this beneficial material.
Materials
Gather these materials to successfully extract beeswax from honeycomb. Each item plays a crucial role in the process, ensuring efficient and effective results.
Honeycomb
Honeycomb serves as the primary material for beeswax extraction. Sourced directly from beehives, it contains both honey and beeswax. Choose honeycomb free from impurities for the best results. Fresh honeycomb yields higher quality beeswax. A typical beeswax production from one pound of honeycomb will produce about 0.2 to 0.4 pounds of beeswax. Ensure that the honeycomb is cut into smaller chunks to facilitate easier melting and extraction.
Water
Water is essential during the extraction process. Use clean, filtered water to prevent contamination. Water acts as the medium for melting honeycomb, making it easier to separate the beeswax from honey and debris. Typically, a ratio of one part honeycomb to two parts water works effectively. Boiling the mixture allows the honeycomb to dissolve, facilitating more efficient extraction. Maintain a gentle simmer rather than a vigorous boil to avoid damaging the beeswax.
Cheesecloth or Fine Mesh Strainer
Cheesecloth or Fine Mesh Strainer aids in separating melted beeswax from the liquid mixture. Choose a cheesecloth with a tight weave or a fine mesh strainer to ensure effective filtration. Allow the melted mixture to cool slightly before pouring it through the cheesecloth, catching solid pieces and honey remnants while retaining the liquid beeswax. This step ensures a pure end product suitable for use in various applications.
Glass Jar or Container
Glass Jar or Container is necessary for collecting and storing the extracted beeswax. Select a heat-resistant glass jar that can withstand the temperature of melted beeswax. Ensure the container is clean and dry before pouring the beeswax into it. Storing beeswax in a sealed glass jar preserves its quality and extends shelf life. When properly stored, beeswax can last indefinitely.
Tools
The right tools enhance the process of extracting beeswax from honeycomb. Use quality equipment for effective results and better efficiency.
Double Boiler or Pot
Choose a double boiler or a pot to melt the honeycomb. A double boiler allows for gentle heating, preventing overheating that can affect the beeswax quality. Fill the bottom pot with water and place the top pot filled with honeycomb on top. For those without a double boiler, a regular pot suffices. Use a low heat setting to keep the water simmering and avoid direct contact with high flames. A typical pot capacity of 3 to 5 quarts accommodates around 1 pound of honeycomb with the suggested 2 parts water. This setup maintains an even temperature while melting solid honeycomb into a liquid form.
Heat Source
Select a Heat Source that provides consistent and controllable heat. An electric stove works well, offering precise temperature control. If using a gas stove, monitor the flame closely. Avoid open flames on direct contact with your pot, as this may cause the honeycomb to burn and alter its properties. A temperature of around 145°F to 160°F effectively melts the honeycomb without damaging the beeswax. Invest in a kitchen thermometer to ensure accuracy. Maintaining the right temperature allows for optimal extraction of pure beeswax from the honeycomb.
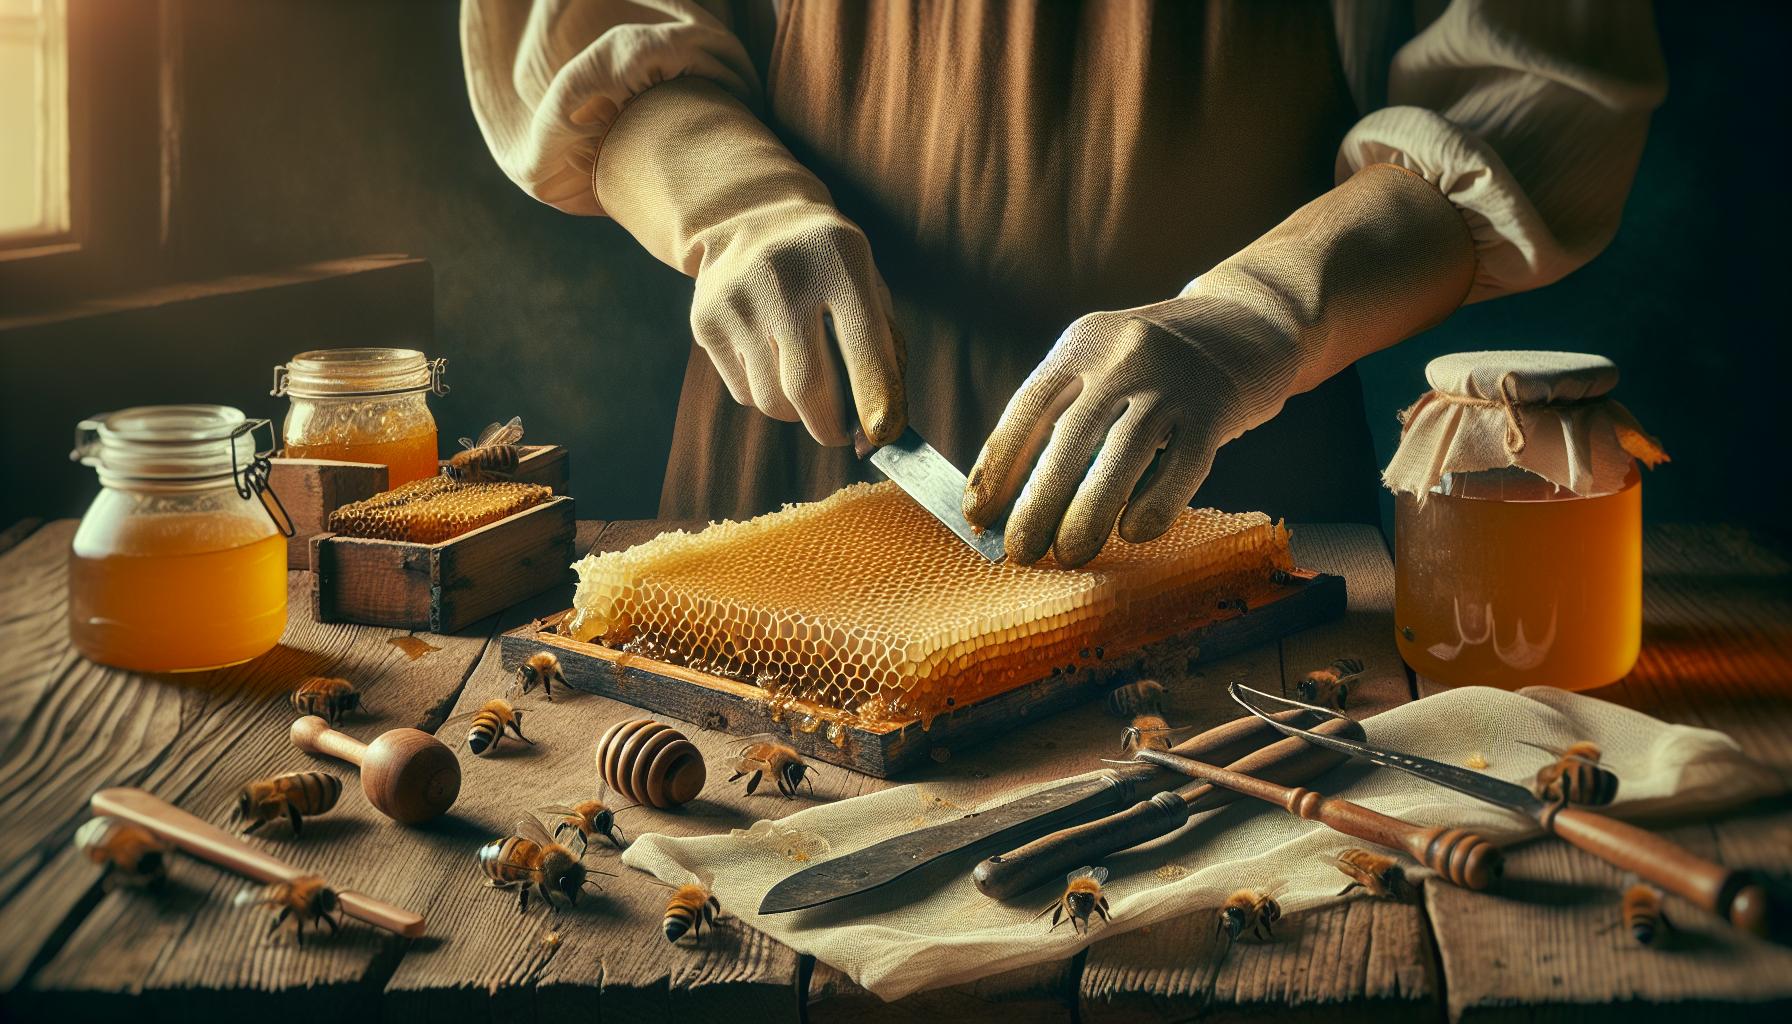
Knife or Scraper
Utilize a knife or scraper for processing the honeycomb. A sharp knife helps break the honeycomb into manageable pieces. Cut the honeycomb into smaller chunks for easier melting. A silicone spatula or scraper aids in transferring melted beeswax from the pot to storage containers. Choose tools that withstand heat well to ensure durability during use. Cleaning these tools promptly after extraction prevents any sticky residue from hardening. Effortless cleanup allows for better maintenance of your tools and a smoother overall process.
Preparation
Preparation involves a few straightforward steps to ensure successful extraction of beeswax from honeycomb.
Harvesting Honeycomb
Harvesting honeycomb involves careful steps to gather honeycomb without harming bees or the hive. Wear protective gear, like a bee suit and gloves, to prevent stings. Use a hive tool to lift frames gently, ensuring not to crush honeycomb or bees. Remove frames with capped honeycomb, which appears dark and dry. Aim to collect honeycomb when it's fully established, typically during late summer or early fall. When extracting, cut away sections of honeycomb from the frame using a sharp knife. Gather these pieces in a container, avoiding any that contain live bees or too much honey. Respecting the hive ensures the colony remains healthy and productive.
Cleaning the Honeycomb
Cleaning honeycomb ensures higher quality beeswax for your projects. Start by removing excess honey; drain the honey by placing the honeycomb in a fine mesh strainer or cheesecloth. Rinse the honeycomb sections with cold water to remove impurities, dirt, and bee debris. Do not soak the honeycomb, as this might compromise the wax quality. Instead, tap gently to dislodge any remaining particles. After cleaning, let the honeycomb dry completely on a clean surface. This process guarantees that only pure materials enter the melting phase, yielding a superior final product.
Extraction Process
Extracting beeswax from honeycomb follows a straightforward process that involves melting and straining. This ensures purity and quality for various uses.
Melting the Honeycomb
Melting the honeycomb occurs in a double boiler or a pot. Place the honeycomb pieces into the top part of the double boiler. Add water to the bottom part, maintaining a ratio of one part honeycomb to two parts water for optimal results. Heat the mixture gently to a temperature range of 145°F to 160°F. Avoid direct heat to protect the beeswax from damage. Monitor the melting process closely, as it can take 30 to 60 minutes. Stir occasionally to ensure all pieces melt evenly. The goal is to separate the beeswax from any honey and impurities, resulting in a smooth mixture. Remove the pot from the heat once the honeycomb is fully melted, allowing the mixture to cool slightly before moving to the straining process.
Straining the Beeswax
Straining the beeswax focuses on filtering out impurities. Place a cheesecloth or fine mesh strainer over a heat-resistant glass jar. Carefully pour the melted mixture into the strainer, allowing the liquid beeswax to pass through while trapping solid pieces and residual honey. Use a spatula or a spoon to gently press the solids to extract as much beeswax as possible. Dispose of the leftover solids responsibly, as they may contain wax and honey remnants. After straining, let the beeswax cool and solidify in the jar. The cooled beeswax can last indefinitely when stored properly, ensuring you have a quality product for various applications.
Molding the Beeswax
Molding beeswax allows you to shape it for various uses. Proper methods ensure that the wax holds its form well.
Choosing a Mold
Selecting a mold significantly influences the final shape of your beeswax. Consider using silicone molds for flexibility and easy removal. Silicone molds allow for detailed designs and do not require additional oils or sprays for release. Choose molds that fit your desired project, whether making candles, blocks, or shapes. Options include simple geometric designs or intricate patterns. Make sure that the mold can withstand temperatures above 145°F to avoid damage. For larger projects, consider using metal molds, which provide stability. Ensure all molds are clean and dry before pouring the melted beeswax.
Pouring the Beeswax
Pouring melted beeswax requires caution for safety and quality. Use a ladle or a pouring spout to minimize spills. Maintain a steady hand while pouring, filling the mold until it reaches the desired height. Pour slowly to prevent bubbles from forming. If necessary, tap the mold lightly on a flat surface to release any trapped air. Use heat-resistant gloves to protect your hands, especially if using hot areas of the mold. Allow the wax to fill every corner by pouring gently. Avoid sudden movements that can disrupt the mixture. Monitor the pouring temperature closely to keep the wax consistent and prevent rapid cooling.
Cooling and Setting
Cooling and setting beeswax is crucial to achieving solid forms. Allow the poured molds to sit at room temperature for natural cooling. Placing molds in a cool area can help speed up the process. Avoid the refrigerator as rapid cooling can cause cracks. Wait at least 30 minutes to 1 hour to allow the wax to set completely. After setting, check the edges of the mold for any signs of softness. If the edges are still soft, allow more time to firm up. Once fully cooled, carefully remove the beeswax from the molds by gently pulling at the edges. Store the completed shapes in a cool, dry place until ready for use.
Tips for Success
Ensuring Honeycomb Quality
Selecting high-quality honeycomb ensures a better yield of beeswax. Choose honeycomb that is fresh and free from impurities. Look for capped honeycomb, identified by a wax seal that indicates it has ripened honey inside. Inspect for visible debris, such as pollen or dead bees, which can compromise the purity of your beeswax. Avoid older honeycomb, as it likely contains crystallized honey and may yield lower wax quality. Prioritize frames harvested during late summer or early fall since bees produce denser honeycomb during this time. Use a hive tool to carefully lift frames from the hive without damaging the structure, maintaining its integrity for further extraction.
Safety Precautions
Safety plays a critical role in the process of extracting beeswax. Wear protective gear, including gloves and a veil, to safeguard against bee stings. Utilize a sturdy hive tool to lift and manage honeycomb, minimizing the risk of injury. Maintain a clean workspace to avoid accidents and ensure a safe extraction process. Handle hot equipment with care, especially when using a double boiler. Keep a fire extinguisher nearby, as beeswax is flammable and can ignite if overheated. Stay within the recommended temperature range of 145°F to 160°F when melting to preserve beeswax quality. Always clean tools promptly after use to avoid sticky residue buildup, enhancing safety during subsequent tasks.
Troubleshooting
During the extraction of beeswax from honeycomb, few common problems may arise. Recognizing these challenges early on helps in achieving better results.
Common Issues During Extraction
- Impurities in Beeswax: Impurities often include leftover honey particles and bits of comb. Use clean cheesecloth or a fine mesh strainer to filter out unwanted pieces effectively.
- Low Beeswax Yield: Factors like the quality and age of the honeycomb affect yield. Fresh, capped honeycomb yields approximately 0.2 to 0.4 pounds of beeswax per pound. Select high-quality honeycomb for optimal results.
- Heat-Related Damage: Excessive heat can cause the beeswax to break down, altering its properties and color. Maintain a consistent heat range of 145°F to 160°F to prevent damage.
- Inadequate Melting: If the honeycomb does not melt completely, the ratio of water to honeycomb may not be appropriate. Use one part honeycomb to two parts water for thorough melting.
- Difficult Removal from Molds: Using the wrong type of mold can lead to issues when removing set beeswax. Select silicone molds for easy release or use coated metal molds for stability.
Solutions for Melting Problems
- Monitor Heat Levels: Adjust heat levels if the honeycomb fails to melt properly. Use a thermometer to keep track of the temperature and avoid overheating.
- Use a Double Boiler: A double boiler allows for controlled heat application. This method reduces the risk of overheating, ensuring even melting throughout the honeycomb.
- Increase Water Ratio: If melting occurs slowly, increase the water ratio slightly. A mixture of one part honeycomb to two and a half parts water can enhance the melting process without damaging the beeswax.
- Stir Regularly: Regular stirring during the melting stage ensures even heat distribution. Stirring prevents the formation of hot spots that might cause overheating.
- Allow Cooling Gradually: After melting, allow the mixture to cool at room temperature rather than forcing it to set. Gradual cooling helps maintain the integrity of the beeswax.
Conclusion
Extracting beeswax from honeycomb is a rewarding process that connects you to nature and the art of beekeeping. With the right materials and techniques, you can create high-quality beeswax for various projects.
Remember to prioritize safety and cleanliness throughout the extraction process. By following the steps outlined in this guide, you'll ensure a successful yield of pure beeswax that can be used for candles, cosmetics, and more.
Embrace the versatility of beeswax and enjoy the benefits of your hard work. Whether you're a seasoned beekeeper or a curious DIY enthusiast, this natural material opens up a world of creative possibilities.
Frequently Asked Questions
What is beeswax used for?
Beeswax is a versatile natural material used for making candles, cosmetics, food wraps, and even in crafting. Its unique properties, such as a natural barrier and moisturizing qualities, make it popular in various applications.
How is beeswax extracted from honeycomb?
To extract beeswax, you will need to melt honeycomb using a double boiler with water. Once melted, strain the mixture through cheesecloth to filter out impurities. Finally, pour the liquid beeswax into a container and let it cool.
What materials are needed for beeswax extraction?
Essential materials for beeswax extraction include fresh honeycomb, water, a double boiler, cheesecloth or a fine mesh strainer, and a heat-resistant glass jar for storage. These are crucial for a successful and clean extraction process.
How much beeswax can be obtained from honeycomb?
Typically, you can yield about 0.2 to 0.4 pounds of beeswax for every pound of honeycomb processed. The quality of the honeycomb and extraction method can influence the final amount.
What temperature is ideal for melting beeswax?
The ideal temperature for melting beeswax is between 145°F and 160°F. Maintaining a gentle heat is essential to prevent damaging the beeswax during the extraction process.
How do I ensure the best quality beeswax?
To ensure high-quality beeswax, use fresh, impurity-free honeycomb, clean your tools thoroughly after use, and carefully monitor the extraction process. Proper handling and storage can greatly enhance its quality and longevity.
What should I do if I have impurities in my beeswax?
If you notice impurities in your beeswax, consider re-melting it and straining it again through cheesecloth or a fine mesh strainer. This extra step can help achieve a purer final product.
How do I store extracted beeswax?
Store extracted beeswax in a heat-resistant glass jar or container, making sure it is sealed properly. When kept in a cool, dry place, it can last indefinitely without losing quality.
Can I mold beeswax?
Yes, beeswax can be molded into various shapes. It's best to use silicone molds for easy removal and to avoid cracks. Ensure the beeswax has cooled gradually for the best results in molding.
What are some common issues when extracting beeswax?
Common issues include impurities in the wax, low yield, and difficulties with melting. These can often be resolved by monitoring temperatures, adjusting water ratios, and ensuring proper melting techniques.
Ready to transform your honeycomb into pure, natural beeswax?
Unlock the secrets of extracting high-quality beeswax with our step-by-step guide. Whether you’re looking to craft homemade candles, create skincare products, or simply connect with nature, our comprehensive guide makes it easy to get started.
Click here to learn how to extract beeswax from honeycomb and unleash your creativity today!

Leave a comment