Find Quality Queen Cells for Sale to Boost Your Beekeeping Success
If you're a beekeeper looking to boost your hive's productivity or start a new colony, queen cells are your ticket to success. These remarkable structures hold the potential for creating new queens, ensuring your bees thrive and your honey production flourishes. With the right queen cells for sale, you can take your beekeeping journey to the next level.
Understanding Queen Cells
Queen cells serve as vital components in the life cycle of honeybee colonies. Their role focuses on the development of new queens, crucial for colony survival and productivity.
What Are Queen Cells?
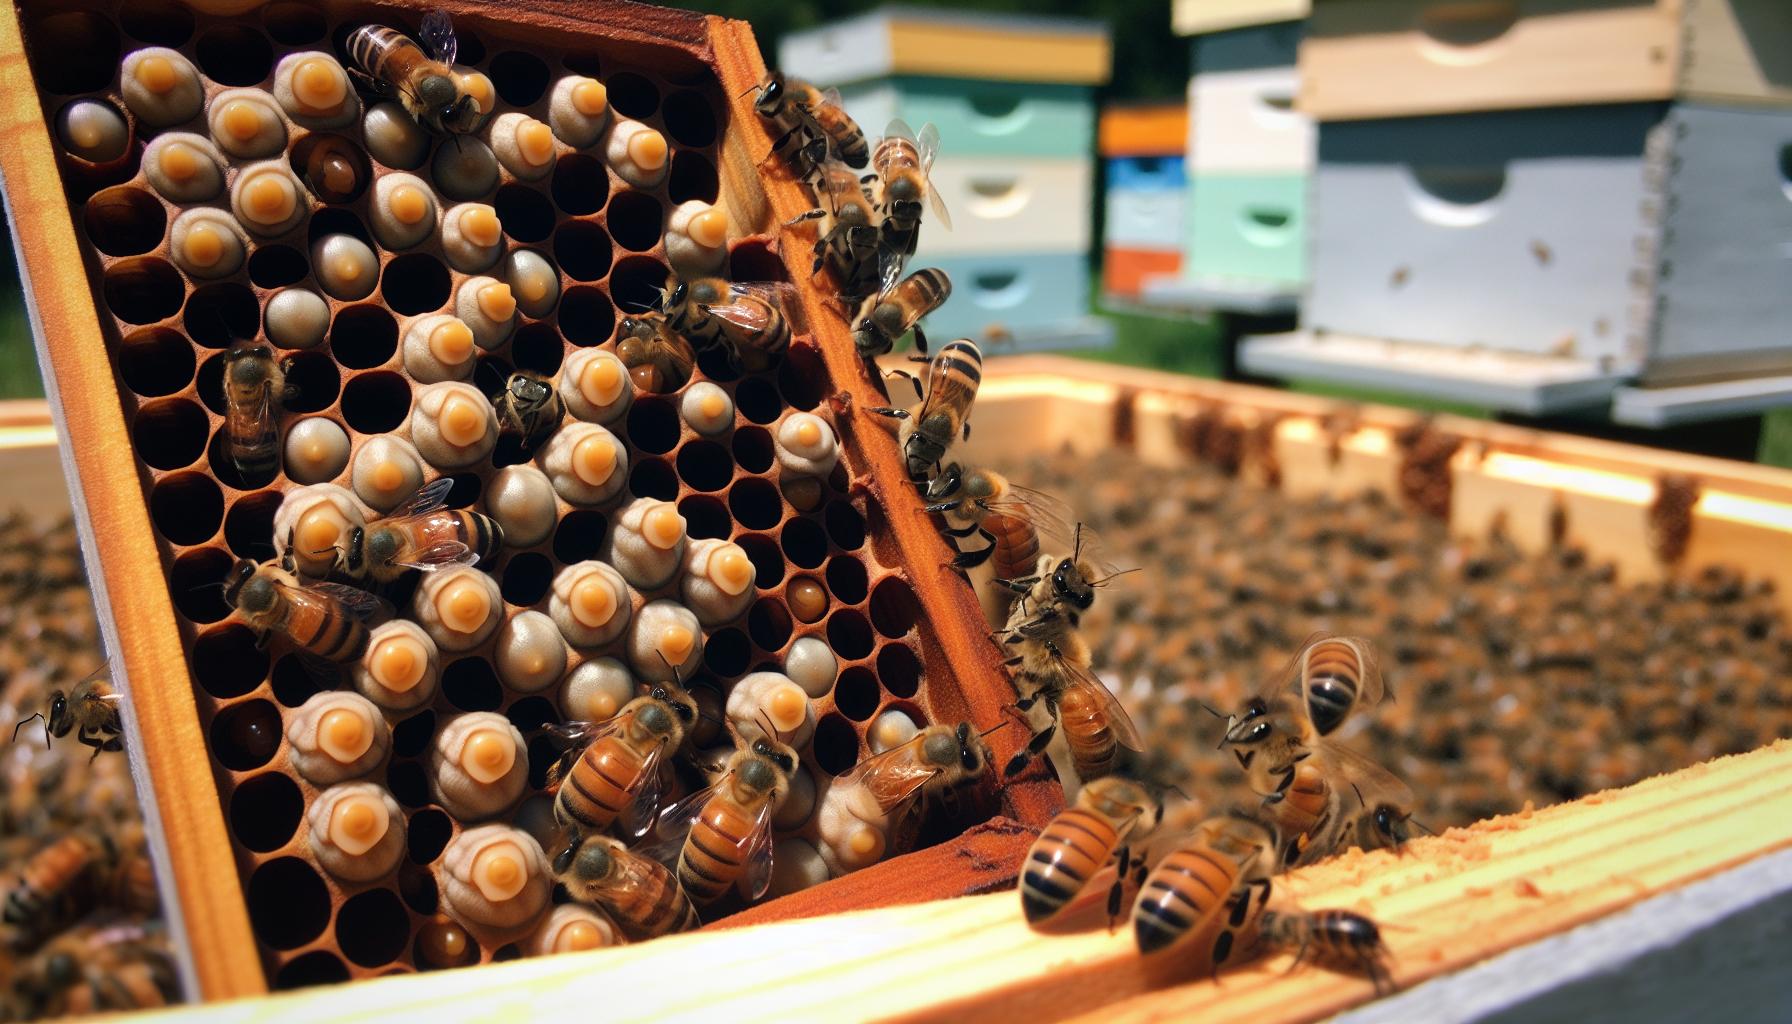
Queen cells are specialized structures where new queen bees grow. These cells differ from worker bee cells in size and shape, appearing larger and usually positioned hanging from the bottom of frames or in specific areas within the hive. Worker bees create queen cells when they decide to produce a new queen, whether due to aging queens, swarming, or disease. Inside these cells, larvae are fed a special diet of royal jelly, which triggers their transformation into queens. This process takes about 16 days from egg to mature queen ready for mating.
Importance of Queen Cells in Beekeeping
Queen cells play a crucial role in maintaining hive health and productivity. Healthy hives require strong queens for effective egg-laying and colony population growth. When beekeepers purchase or create queen cells, they provide for colony expansion, which leads to increased honey production. Additionally, replacing old or failing queens with new ones from queen cells can enhance the hive's vigor. Mating and establishing strong queens directly influence the overall success of beekeeping efforts. New queens also reduce the risk of swarming and improve hive stability.
Finding Queen Cells for Sale
Finding queen cells for sale is essential for enhancing your beekeeping efforts. Various reliable sources exist where you can acquire these vital components for your hives.
Online Marketplaces
Online marketplaces provide a wide selection of queen cells. Websites like eBay, Amazon, and specialized beekeeping sites offer multiple options. You can filter choices based on location, price, and seller ratings. Pay attention to seller reviews to ensure quality. Many sellers ship directly, making the process convenient. Consider reaching out to sellers to inquire about the health and lineage of their queen cells. Research the best times to buy, as seasonal demand can affect availability and price. When ordering, verify the shipping conditions to prevent damage.
Local Beekeeping Supply Stores
Local beekeeping supply stores serve as valuable resources for finding queen cells. Many stores maintain relationships with reputable breeders, guaranteeing the quality of their product. In-store purchases allow you to inspect the cells and speak directly with knowledgeable staff. Local stores often offer advice on best practices regarding introducing new queens to your hives. Explore options to join group purchases with other beekeepers, which can reduce costs. Check for specific delivery dates as some stocks may vary throughout the year.
Beekeeping Associations and Clubs
Beekeeping associations and clubs serve as excellent networks for locating queen cells. Membership offers access to a community of experienced beekeepers who share resources and referrals. Attending meetings can provide insights into local breeders with quality queen cells for sale. Many associations organize group buys, allowing members to save money. Some clubs even sell queen cells directly to members, ensuring you acquire healthy options. Stay informed about any seasonal events or workshops, as these often feature resources related to queen bee production.
Evaluating Quality of Queen Cells
Assessing the quality of queen cells is crucial for successful beekeeping. Healthy queen cells contribute to the establishment of strong queens, which directly affects the productivity of your hive.
Characteristics of Healthy Queen Cells
- Size: Healthy queen cells appear larger than regular worker bee cells. They typically measure about 1 inch in length, indicating adequate space for a developing queen.
- Shape: Healthy queen cells should have a peanut-like shape, extending downward. This shape facilitates the proper development of the queen within.
- Color: Look for creamy white or slightly tan queen cells. Dark or discolored cells may indicate issues with the larvae or the environment where the cells developed.
- Placement: Healthy queen cells are often found at the edges of the frame or in designated queen-rearing setups. Their location can impact their viability.
- Production: Observe whether the cells come from a robust colony. Vibrant hives producing multiple queen cells generally reflect strong genetics.
Red Flags to Watch For
- Deformation: Irregular shapes or poorly formed cells can indicate a troubled colony. Cells should not be crooked or have gaps, which can affect the queen’s development.
- Contamination: Check for any signs of mold or foreign substances inside or around the cells. Cleanliness is vital for preventing diseases.
- Ruptured Cells: If cells are damaged or broken open, this can lead to the death of the developing queen. Examine the integrity of the cells closely.
- Lack of Activity: Inactive or poorly maintained queen cells may point to a declining colony. Active worker bees should be caring for the cells regularly.
- Age of Cells: Assess the maturity of the queen cells; cells too old may not produce viable queens. Optimal age ranges between 6 to 10 days before they are ready to be capped.
How to Purchase Queen Cells
Acquiring queen cells necessitates following straightforward steps to ensure you receive healthy and viable options. Understanding payment methods enhances the purchasing experience.
Steps to Place an Order
- Choose a Source: Identify reliable suppliers. Options include online marketplaces, local beekeeping supply stores, and beekeeping associations.
- Browse the Listings: Review available queen cells. Pay attention to details such as cell characteristics and seller reputation.
- Select the Quantity: Determine how many queen cells to purchase. Consider your hive's size and your specific needs.
- Add to Cart: Click the button to add chosen queen cells to your shopping cart. Verify the selections before proceeding.
- Provide Shipping Information: Enter your address and contact details for delivery. Accurate information prevents delays.
- Review Your Order: Check the items, quantities, and total cost. Confirm everything is correct before finalizing.
- Place the Order: Complete the purchase by clicking the order confirmation button. Save any confirmation emails for reference.
Payment Methods and Considerations
Credit and Debit Cards: Most suppliers accept major cards like Visa and MasterCard for convenience.
PayPal: Many sellers offer PayPal as a safe alternative. This method provides buyer protection.
Bank Transfers: Direct bank transfers may be an option. Confirm this with the supplier before placing an order.
Transaction Fees: Be aware of additional fees. Some payment methods may incur extra charges.
Refund Policies: Review the supplier’s refund and return policies. Understanding these helps manage expectations if issues arise.
Shipping Costs: Factor in shipping fees when budgeting. Costs vary based on distance and choice of shipping method.
Order Tracking: Choose suppliers that provide tracking information. This allows you to monitor the progress of your order.
Preparing for Queen Cells Arrival
Preparing for the arrival of queen cells requires careful attention to several key aspects. Getting everything ready ensures a smooth integration into your hive.
Necessary Materials
Gather essential materials before queen cells arrive.
- Protective Gear: Use gloves and a veil for safety during hive inspections.
- Beehive Tool: Have a hive tool handy for opening hives and handling frames.
- Queen Cell Holder: Utilize a special holder or cage for transferring queen cells safely.
- Pollen Substitute or Nectar Feed: Provide supplemental nutrition to support the colony during the queen rearing process.
- Hive Boxes: Prepare additional hive boxes to accommodate increased activity.
- Feeding Equipment: Set up feeders to supply your bees with sugar syrup during the transition.
Check your inventory to ensure you possess all necessary items, as missing equipment can create challenges during your workflow.
Setting Up the Hive
Setting up your hive properly increases the chances of a successful queen cell integration.
- Choose the Right Hive Location: Select a sunny and sheltered spot to protect your bees.
- Inspect the Hive: Conduct a thorough examination of the existing colony. Remove any queen cells if the colony is strong and ensure a sufficient number of bees are present.
- Space Management: Add space as needed to accommodate new workers that will hatch from the queen cells.
- Temperature Control: Keep the hive warm, especially if the weather is cool, as proper temperature aids development.
- Minimize Disturbance: Avoid frequent disruptions to the hive during this period to allow the new queens to develop without stress.
Creating an optimal environment empowers the queen cells to thrive and supports a healthy hive population.
Installing Queen Cells in Your Hive
Successful installation of queen cells boosts hive productivity and colony strength. Follow the steps closely to ensure a smooth integration.
Step-by-Step Guide
- Prepare the Hive: Ensure your hive is clean and well-organized. Remove any frames that may obstruct the new queen cells.
- Inspect the Colony: Evaluate the current colony's health. A strong colony with adequate resources enhances acceptance of new cells.
- Carefully Remove Queen Cells: Extract the queen cells from their packaging or holder. Handle them gently to prevent damage.
- Position the Queen Cells: Insert the queen cells into the chosen location within the hive. Aim for the center of a frame for optimal warmth and attention.
- Seal Gaps: Close any gaps in the hive to maintain proper humidity and temperature. This creates a nurturing environment for the new queens.
- Monitor Hive Conditions: Check the hive's conditions regularly. Ensure proper ventilation and temperature are maintained during the acceptance period.
- Observe Acceptance: Watch for signs of acceptance, such as worker bees tending to the queen cells. This indicates that the colony is integrating the new queens.
Best Practices for a Successful Installation
- Choose Quality Queen Cells: Source queen cells from reputable suppliers. Healthy cells increase the likelihood of successful queen development.
- Introduce During a Calm Period: Install queen cells when the colony is not swarming or experiencing significant stress. A calm environment promotes better acceptance.
- Limit Disturbance: Minimize hive inspections after installing queen cells. Frequent disturbance can stress the bees and hinder acceptance.
- Provide Adequate Food: Ensure the colony has enough food sources available. Adequate nourishment supports both nurse bees and developing queens.
- Keep Records: Document the installation date and the source of the queen cells. Tracking this information aids in future planning.
- Be Patient: Allow sufficient time for the new queens to develop. Monitoring progress leads to a better understanding of the colony's overall health and productivity.
Post-Installation Care
Proper care after installing queen cells enhances the likelihood of a successful transition. Focus on monitoring the colony and ensuring the environment supports queen development.
Monitoring the Queen’s Development
Check the queen cells regularly during the 16 days of development. Look for signs of activity like cell closure, which indicates that your queen has started to pupate. Inspecting the hive every few days provides insight into the colony’s overall health. Pay attention to the bees' behavior; active foraging and consistent hive activity suggest a positive environment.
Also monitor the temperature inside the hive. Ideally, the temperature remains around 92°F to 95°F to support brood development. If the colony shows signs of stress, such as diminished activity or abnormal behavior, assess hive conditions. Identify potential issues like pests or inadequate food stores, as these affect the queen's development.
Tracking developments in your queen cells aids in making adjustments swiftly, ensuring the colony thrives.
Signs of a Successful Introduction
Look for specific indicators that suggest the queen has integrated successfully into the colony. Observe the bees for signs of acceptance, such as a calm atmosphere and bees clustering around the new queen. A highly active queen will begin laying eggs approximately 5 to 7 days after emerging from the cell.
Another clear sign includes the presence of newly laid eggs in the brood frames. Healthy eggs appear as small, pearly white shapes standing upright in the cells. Additionally, the colony’s behavior shifts toward productivity, with increased foraging activity and reinforced hive construction.
Active communication among the bees through buzzing indicates a thriving community. If you notice different behaviors or if the queen does not lay eggs within ten days, reassess the situation. Ensure the introduced queen's acceptance while paying attention to the overall health of the hive.
Troubleshooting Common Issues
Beekeepers may encounter various issues during the queen cell installation and growth process. Addressing these concerns promptly strengthens hive health and productivity.
What to Do If the Queen Fails to Hatch
Monitor the queen cells closely during the 16-day development period. If there are no signs of hatching, such as closed cells over time, check the environment. Ensure the hive temperature remains within a suitable range, typically between 90°F to 95°F.
Inspect for signs of damage to the queen cells. Damage can result from pests or rough handling. If the cells appear intact, evaluate the age of the cells. Cells older than 10 days might not hatch due to inactivity.
Consider the genetics of the queen cells as well. Poor breeding practices can produce non-viable cells. If you suspect this issue, consider sourcing new queen cells from a different and reputable supplier.
If hatch failure occurs consistently, you may need to reassess the overall colony health. Look for deformed bees or signs of disease, and address any issues that could impede successful queen development.
Addressing Aggressive Hive Behavior
Aggressive behavior in the hive can disrupt your beekeeping activities. Start by identifying the triggers causing the aggression. Common triggers include disturbances like loud noises, sudden movements, or strong scents.
Examine the hive for signs of stress among bees. Inspect for overcrowding, which can lead to irritability. If overcrowding occurs, consider adding more space or splitting the colony into two hives to reduce tension.
Maintain a calm approach when managing the hive. Wear protective gear to avoid stings, but remain gentle during inspections. Move slowly and avoid sudden actions that might provoke bees.
If aggression persists, assess the queen's health. A failing queen can lead to hive unrest. If necessary, replace the queen with one from a more docile lineage.
Regular hive inspections also contribute to reducing stress. Ensure that the bees have access to food and water and monitor overall colony health to maintain harmony within the hive.
Alternatives to Purchasing Queen Cells
Exploring options beyond purchasing queen cells can enhance your beekeeping endeavors.
Raising Queens Naturally
Raising queens naturally involves encouraging your existing colonies to produce their own queen cells. Start by selecting a strong colony exhibiting signs of swarming. Ensure that the colony has ample resources, such as honey and pollen, to support the development of new queens.
- Inspect the Colony: Regularly inspect the colony and identify any queen cells that workers have started.
- Provide Space: Add space by removing frames with brood or honey to give the colony more room to raise new queens.
- Introduce Queen Cells: If raising queens takes longer than desired, consider introducing eggs or young larvae into queen cells. This provides a better chance for genetic diversity in your new queens.
- Monitor Development: Over a span of 16 days, check the queen cells for signs of activity. Successful development manifests as cell closure and healthy larval growth.
- Introduce New Queens: Once the queen emerges, she will mate and begin laying eggs, replenishing your hive's population.
Raising queens naturally saves costs and encourages a more resilient hive.
Splitting Hives as an Alternative
Splitting hives is a method to create new colonies while keeping the existing ones strong. This involves dividing a healthy hive into two parts, providing an opportunity for new queen development.
- Select the Hive: Choose a vibrant colony with abundant resources for splitting.
- Divide the Frames: Move frames containing brood, eggs, and honey into a new hive box. This ensures that both hives have adequate resources to thrive.
- Leave Queen Cells in Place: If your existing colony has queen cells, leave these in place to promote self-production of a new queen.
- Close Monitoring: After splitting, monitor both hives for signs of successful queen development and health.
- Manage Conditions: Provide adequate ventilation and food to support both hives through their transition.
This strategy boosts hive numbers quickly while maintaining healthy populations, creating opportunities for expansion without purchasing queen cells.
Conclusion
Investing in queen cells can significantly elevate your beekeeping success. By ensuring you have strong queens in your hives, you enhance productivity and promote healthy bee populations. Remember to carefully evaluate the quality of queen cells before making a purchase.
Finding reliable sources for queen cells is crucial for your hive's health. Whether you choose online marketplaces or local suppliers, prioritize quality and monitor your new queens closely after installation.
With patience and attention to detail, you can foster a thriving beekeeping environment that benefits both you and your bees. Embrace the journey of raising strong queens and enjoy the rewards of a prosperous hive.
Frequently Asked Questions
What are queen cells and why are they important for beekeepers?
Queen cells are specialized structures built by worker bees to rear new queens. They are crucial for enhancing hive productivity and establishing new colonies. A healthy queen ensures effective egg-laying and population growth, leading to increased honey production.
How do I identify healthy queen cells?
Healthy queen cells are characterized by a uniform, elongated shape, and a smooth surface. They should be located in a supportive environment within the hive, showing signs of activity. Avoid cells with deformations, contamination, or lack of activity.
Where can I find queen cells for sale?
You can purchase queen cells from various sources, including online marketplaces like eBay and Amazon, local beekeeping supply stores, and beekeeping clubs. Always choose reliable vendors to ensure the quality of your purchase.
What materials do I need to prepare for queen cell installation?
Before installation, gather necessary materials including protective gear, hive tools, queen cell holders, and feeding equipment. Proper setup and organization will help ensure a successful introduction of the queen cells.
What is the installation process for queen cells?
To install queen cells, maintain a clean hive, inspect the colony's health, and position the cells carefully. Introducing the cells during calm periods with minimal disturbances and adequate food is essential for success.
How do I monitor the queen cells after installation?
After installing the queen cells, check them regularly for signs of activity, like cell closure, during the 16-day development phase. Observing hive behavior and monitoring overall colony health will also indicate successful integration.
What should I do if the queen doesn't lay eggs after installation?
If the queen does not lay eggs within ten days, reassess the situation. Check for environmental issues, signs of stress, or lack of acceptance by the hive, as these factors can impact the queen's success.
Are there alternatives to purchasing queen cells?
Yes, alternatives include raising queens naturally by encouraging existing colonies to produce their own queen cells or splitting hives to establish new colonies. These methods can be cost-effective and enhance hive resilience.
How can I troubleshoot issues during the queen cell process?
For troubleshooting, monitor the environment, check for any damage, and evaluate the age and genetics of the queen cells. Address aggressive behavior by identifying triggers and approach inspections calmly to maintain hive stability.
Boost Your Hive's Success with Healthy Queen Cells
Ready to enhance your beekeeping journey and maximize your hive’s productivity? Adding healthy queen cells could be your next best move! Whether you’re aiming to strengthen an existing colony, prevent swarming, or raise new queens, queen cells provide the foundation for a thriving hive.
Don’t miss the opportunity to take your beekeeping efforts to the next level!
Explore top-quality queen cells for sale today and ensure your bees—and honey production—flourish.
Click now to find trusted suppliers, learn installation tips, and start growing stronger, more productive colonies!

Leave a comment