How to Install a Package of Bees: A Simple Step-by-Step Guide
Installing a package of bees can seem daunting, but it's an exciting step toward becoming a beekeeper. Whether you're looking to pollinate your garden or harvest honey, understanding the installation process is crucial. With the right preparation and knowledge, you’ll create a thriving environment for your new bees.
Materials Needed
To install a package of bees successfully, gather these essential materials in advance. This preparation ensures a smooth installation process.
Package of Bees
A package of bees typically contains about 3,000 to 15,000 bees along with a mated queen. Select a reputable supplier to ensure healthy bees. Choose packages labeled as disease-free to minimize potential issues. Inspect the package upon arrival. A vigorous package appears active and bustling with bees. Confirm that the queen is present in the provided cage.
Beehive
A beehive acts as the new home for your bees. Choose a hive type, such as Langstroth or top-bar hives, based on your preferences and environment. Ensure that the hive is clean and free from any contaminants before introducing the bees. Position the hive in a sunny location with some wind protection. Check that the hive has enough frames, as standard hives usually contain eight or ten frames. Proper ventilation is key for the bees' health.
Protective Gear
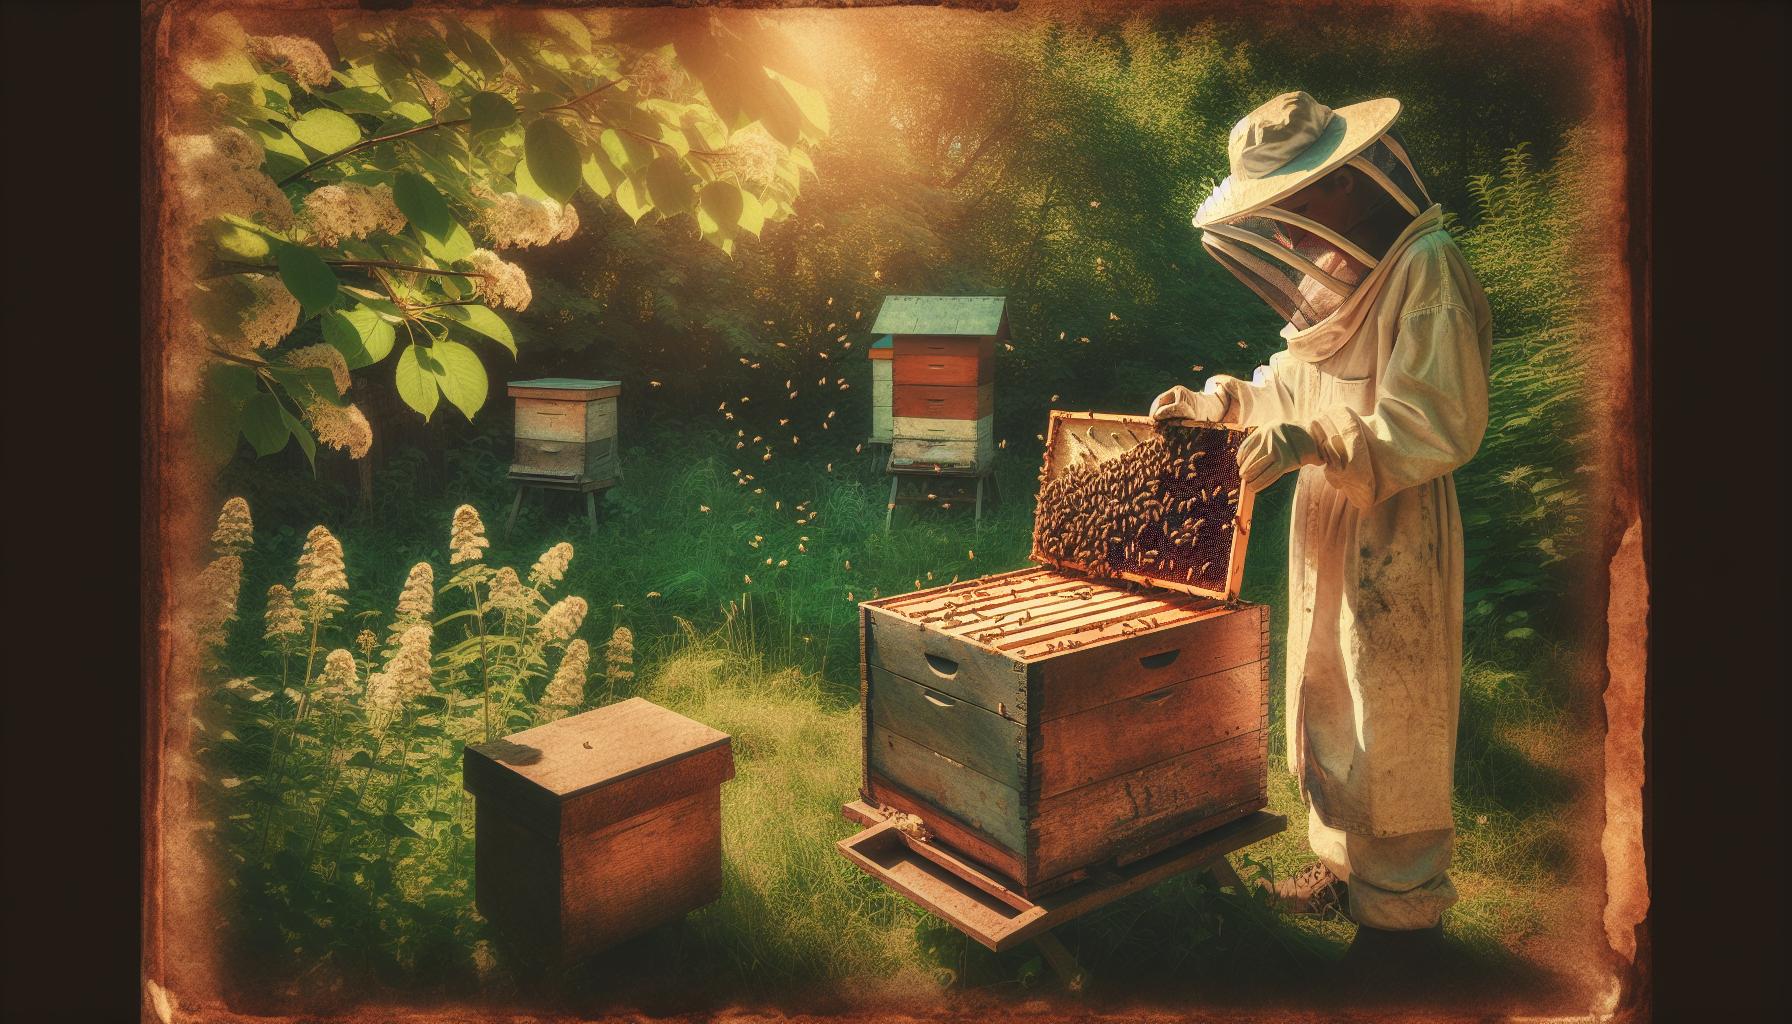
Protective Gear is necessary for your safety during the installation process. Equip yourself with a beekeeping suit and gloves to minimize the risk of stings. Choose a veil or hat to protect your face and neck. Ensure that the gear fits well to prevent any accidental exposure. Consider additional equipment like knee pads for comfort while working at hive level. Always keep your protective gear nearby to use whenever interacting with the bees.
Tools Required
Tools Required for the installation include a smoker, hive tool, and bee brush. The smoker produces cool smoke that calms the bees and makes handling easier. A hive tool assists in prying apart frames or lifting the hive box. Use a bee brush to gently remove bees from surfaces without harming them. Additional items such as a bucket for sugar water can aid in feeding the bees after installation. Keep your tools organized and accessible throughout the process.
Preparation Steps
Preparation plays a crucial role in the successful installation of a package of bees. Following these steps ensures a smooth process and a healthy environment for your new bees.
Choosing the Right Location
Choosing the right location for your beehive is essential for the health and productivity of your bees. Select an area that receives at least six hours of sunlight daily. Bees thrive in warm conditions and benefit from exposure to sunlight. Avoid placing the hive in areas with heavy wind as that can stress the bees. Ensure the location has easy access to water sources like ponds or birdbaths, as bees require water for various colony functions. Position the hive off the ground using cinder blocks or stands to prevent moisture buildup. Choose a site that is not too close to high traffic areas to reduce disturbances to the bees. Additionally, consider nearby flowering plants and trees that provide food resources, as this supports the beekeeping effort.
Assembling the Beehive
Assembling the beehive properly sets the stage for the bees' arrival. Gather all hive components including the bottom board, hive bodies, frames, and top cover. Start by placing the bottom board on a level surface. Attach the first hive body securely, ensuring it fits snugly over the bottom board. Insert frames into the body, ensuring they are evenly spaced and properly aligned. Use the correct number of frames typically around ten per body allows ample space for the bees. Place the second body on top if necessary for additional space, especially during peak nectar flow. Cap it with the top cover to protect the bees from elements. Verify that all parts are securely assembled to prevent any gaps or openings, as these can lead to bee escapes and pests entering.
Preparing the Package of Bees
Preparing the package of bees involves careful handling to ensure their health upon installation. Upon arrival, inspect the package for any visible signs of stress or damage. If the weather is warm, ensure the bees are not overheating in the package. Keep the package in a cool, shaded area until ready for installation. Before opening it, gently shake the package to ensure bees are active and the queen is secure. Check for any dead bees in the bottom and remove them. Place the sugar candy or syrup feeder inside the package to help feed the bees during the transition. This sustains the bees as they adjust to their new home. When ready to install, open the package gently, allowing the bees to acclimate before moving them into the prepared hive.
Installation Process
The installation process for a package of bees involves three main steps. These steps ensure the smooth integration of bees into their new home.
Removing the Bees from the Package
Removing the bees from the package requires careful handling. First, set up your workspace, ensuring it's calm and free from disturbances. Open the package gently but quickly, minimizing direct exposure. Use your bee brush to gently sweep any bees toward the opening. Next, remove the queen cage, ensuring she is unharmed. Keep the cage away from the direct sun. Carefully sprinkle a bit of sugar water inside the package to encourage the bees to move out. By creating a comfortable environment for the bees, you establish a positive start for their transition.
Introducing the Bees to the Hive
Introducing the bees to the hive involves specific techniques for a smooth transition. First, place the queen cage between frames of the hive, ensuring her escape hole faces downward. Then, gently shake the remaining bees into the hive, allowing them to disperse naturally. Cover the hive with its lid immediately to keep vibrations low and temperature stable. Monitor the hive entrance to ensure that bees enter without disruption. Providing fresh sugar water for the first few days encourages the bees to acclimate and begin foraging.
Securing the Hive Entrance
Securing the hive entrance is crucial for protecting the bees. Start by placing an entrance reducer to limit access, especially in the initial days. Reducing the entrance size helps the bees defend against intruders while they adapt to their new environment. Use a screen if you suspect pests might pose a threat. Ensure that the hive is well-ventilated to support proper airflow. Regularly check the entrance for any signs of unwanted visitors or blockages. These steps safeguard the hive and create a safe environment for the bees to thrive.
Post-Installation Care
Caring for your new bees after installation is crucial for their health and productivity. Proper management ensures a thriving colony.
Feeding the Bees
Feeding your bees helps them adjust to their new environment. Begin with a sugar syrup mixture of one part sugar to one part water. Provide this syrup in a feeder for the first few weeks. Avoid using honey from other sources to prevent disease transmission. Monitor feeder levels regularly and refill as needed. Additionally, consider offering protein supplements in the form of pollen patties, especially during early spring. These supplements support bee development and brood rearing. Once your bees establish foraging patterns, reduce feeding, as they will start to collect natural food sources when the flowers bloom. Regular feeding provides nutrients crucial for colony growth and boosts their immune system during this transition period.
Monitoring for Health
Monitoring your bee colony promotes long-term health and productivity. Inspect your hive weekly for signs of stress or disease. Look for healthy broods, active foraging bees, and the queen's presence. A thriving colony displays a strong population and active behavior. Check for varroa mites and other pests; consider using sticky boards or drone brood removal to control their numbers. Also, ensure your hive has adequate ventilation and is free from mold. Maintain a clean environment to prevent the spread of diseases. If you spot issues, act quickly to remedy them. Keeping your bees healthy contributes to strong honey production and helps sustain the colony through seasonal changes. Regular checks are vital for maintaining a successful beekeeping experience.
Troubleshooting Common Issues
Beekeeping involves various challenges. Addressing common issues helps ensure a healthier colony.
Dealing with Aggressive Bees
Aggressive bee behavior can occur for several reasons. Identify the cause first. Disturbance during installation can create stress. Minimize movement and noise around the hive. Monitor weather conditions. Bees may react negatively to cold or rainy weather.
Use proper protective gear during hive inspections. A full suit, gloves, and a veil provide necessary protection. Apply smoke sparingly to help calm bees. Light a smoker and puff a small amount of smoke at the hive entrance before opening it.
Consider the genetics of your bees. Some breeds, like Italians, are generally docile. If aggression persists, consult your supplier. They may offer solutions or replacements from calmer stock. Always maintain calm behavior; sudden moves or loud sounds may increase bee defensiveness.
Bees Not Settling into the Hive
Several factors can lead to bees failing to settle. Inspect the hive location. Ensure it offers six hours of sunlight and adequate wind protection. A poor location can impede their comfort.
Check the hive condition. Ensure it is clean and free from pests or debris. Bees often refuse to stay in a contaminated environment. Provide food during their initial days in the hive. A sugar syrup can help them adapt.
Assess the queen's health. A healthy queen encourages hive stability. Look for queen presence and signs of her laying eggs. Avoid disturbing the hive frequently. Allow bees to acclimate to their new environment. Regular checks are important but avoid constant interference.
Helpful Tips for Successful Installation
Successfully installing a package of bees requires careful planning and attention to detail. Following best practices enhances the likelihood of establishing a thriving colony.
Best Time to Install
Choosing the right time for installation significantly impacts the success of your beekeeping venture. Install the package of bees in the early afternoon or late evening. During these times, bees are less active and more likely to settle into their new hive peacefully. Avoid colder months, especially below 50°F (10°C). Bees struggle to acclimate when temperatures dip too low. Aim for a sunny day following a period of warm weather. Bees thrive in warmth and are more active, making the installation process smoother. Inspect your local climate and choose a date when temperatures are consistently mild. This consideration benefits both you and the bees, establishing a conducive environment for their transition.
Weather Considerations
Monitoring weather conditions is crucial when installing a package of bees. Avoid installing during rain or strong winds. Wet conditions can stress bees and hinder their ability to orient themselves to the new surroundings. Check the forecast for the installation day and the following week. A dry week ensures bees can forage effectively and reduces the risk of stress due to poor conditions. Keep an eye on pollen availability; bees need access to flowers for foraging soon after installation. Plan accordingly if thunderstorms are expected. A calm, stable weather pattern supports a smoother transition for the bees, promoting their long-term success in the new hive.
Conclusion
Successfully installing a package of bees is a rewarding experience that sets the foundation for your beekeeping journey. With the right preparation and care you'll create a thriving environment for your new colony.
Remember to monitor your hive regularly and provide proper nutrition to support their growth. Staying attentive to their needs and maintaining a clean and safe habitat will help ensure a healthy and productive bee population.
Embrace the challenges and joys of beekeeping as you contribute to your local ecosystem and enjoy the fruits of your labor. Your efforts will not only benefit your garden but also foster a deeper connection with nature.
Frequently Asked Questions
What materials do I need to install a package of bees?
To install a package of bees, you need a package of bees (3,000 to 15,000 bees and a mated queen), a beehive with frames, protective gear (beekeeping suit and gloves), and tools such as a smoker, hive tool, and bee brush. Having these materials ready ensures a smoother installation process.
How should I prepare the beehive before installation?
Prepare the beehive by ensuring it is clean, positioned in a sunny location that receives at least six hours of sunlight daily, and sheltered from strong winds. Make sure to check that all components fit securely to prevent gaps that could allow pests or bees to escape.
When is the best time to install a package of bees?
The best time to install bees is in the early afternoon or late evening on a warm, sunny day. Avoid doing it during colder months or inclement weather to minimize stress on the bees and ensure a smooth transition into their new hive.
How do I handle the bees during installation?
When handling the bees, create a calm workspace, gently open the package, and avoid disturbing them too much. Using sugar water can help encourage the bees to move out of the package easily. Handle the queen cage carefully, placing it between frames during introduction.
What post-installation care do bees need?
After installation, feed the bees with a sugar syrup mixture to help them acclimate. Regularly inspect the hive for signs of stress or disease, checking for healthy brood and the queen's presence. Ensure good ventilation and a clean environment for long-term health.
How can I mitigate aggressive behavior from bees?
To reduce aggression, identify the cause, minimize disturbances during inspections, and use protective gear. It’s important to ensure the location of the hive is suitable and keep the environment as stress-free as possible to help the bees adjust.
Ready to install your first package of bees and begin your beekeeping journey? Don’t let the process overwhelm you—this guide has everything you need to create a thriving, healthy hive from day one. From selecting the right hive and gear to troubleshooting common issues, we’ve got you covered. Take the first step toward a rewarding beekeeping experience by following these expert tips. Your bees—and your future honey harvest—are counting on you!
Start your beekeeping journey today and build a thriving hive!

Comments
Leave a comment